School alumni
In Ekattor, you can manage previous information of students, events, alumni galleries with this addon. Configuring this addon, you can enhance the feature of all your past students. You can create, update, delete alumni information, events and gallery to your school.
To enhance this feature, you have to install this addon on your application. Now, you have to navigate:
- Before installing the process, we highly recommend you check your application version. For this, you have to navigate to the "About" section from the "Settings" button.
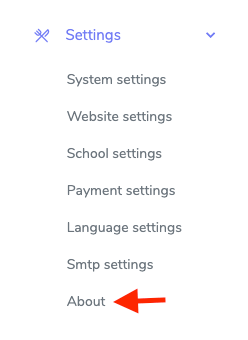
Figure 1. Ekattor ERP Checking Application Version
- If you are running the mentioned version, then you are ready to install this addon.
- Download the addon you want to install on your application from Codecanyon.
- Unzip the downloaded file.
- You will get two folders inside the file. One for documentation and the other for the addon folder.
- Do not try to remove or rename any folder.
- Go back to the application and log in as an admin.
- Select the "Back office" option from the left menu.
- Choose the "Addon manager" option from the sub-menu.
- Click on the "Add new addon."
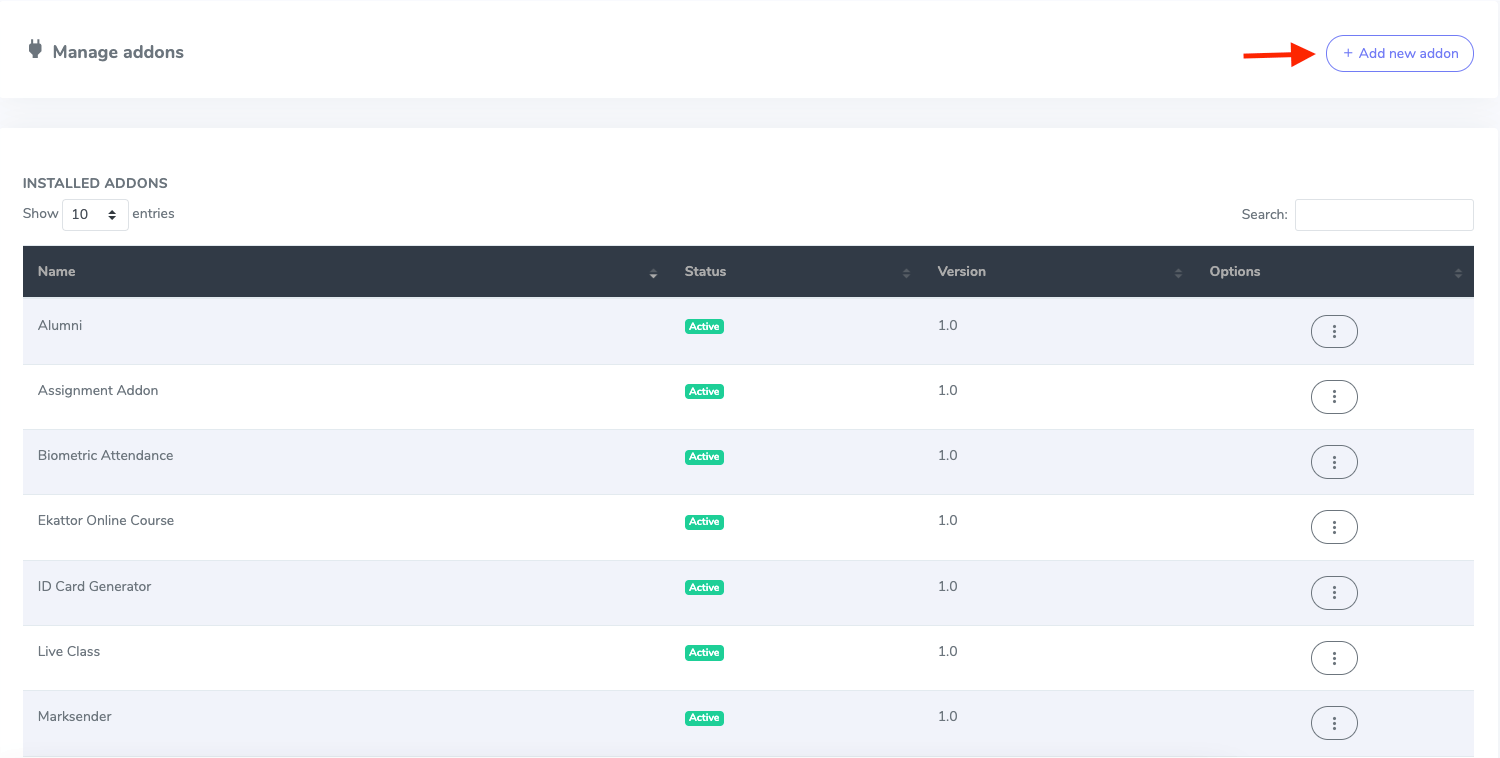
Figure 2. Ekattor ERP Adding New Addons
- Provide the purchase code.
- Upload the zip file from your device.
- Click on the "Install addon" button.
- You will get a success message notification.
Superadmin and admin can configure this panel. For this, you have to follow the steps:
- Log in to the superadmin panel.
- Select the "Alumni" option from the left menu.
To add a new alumni's information, you have to navigate:
- Select the "Alumni" option from the left menu.
- Choose the "Manage alumni" option from the sub-menu.
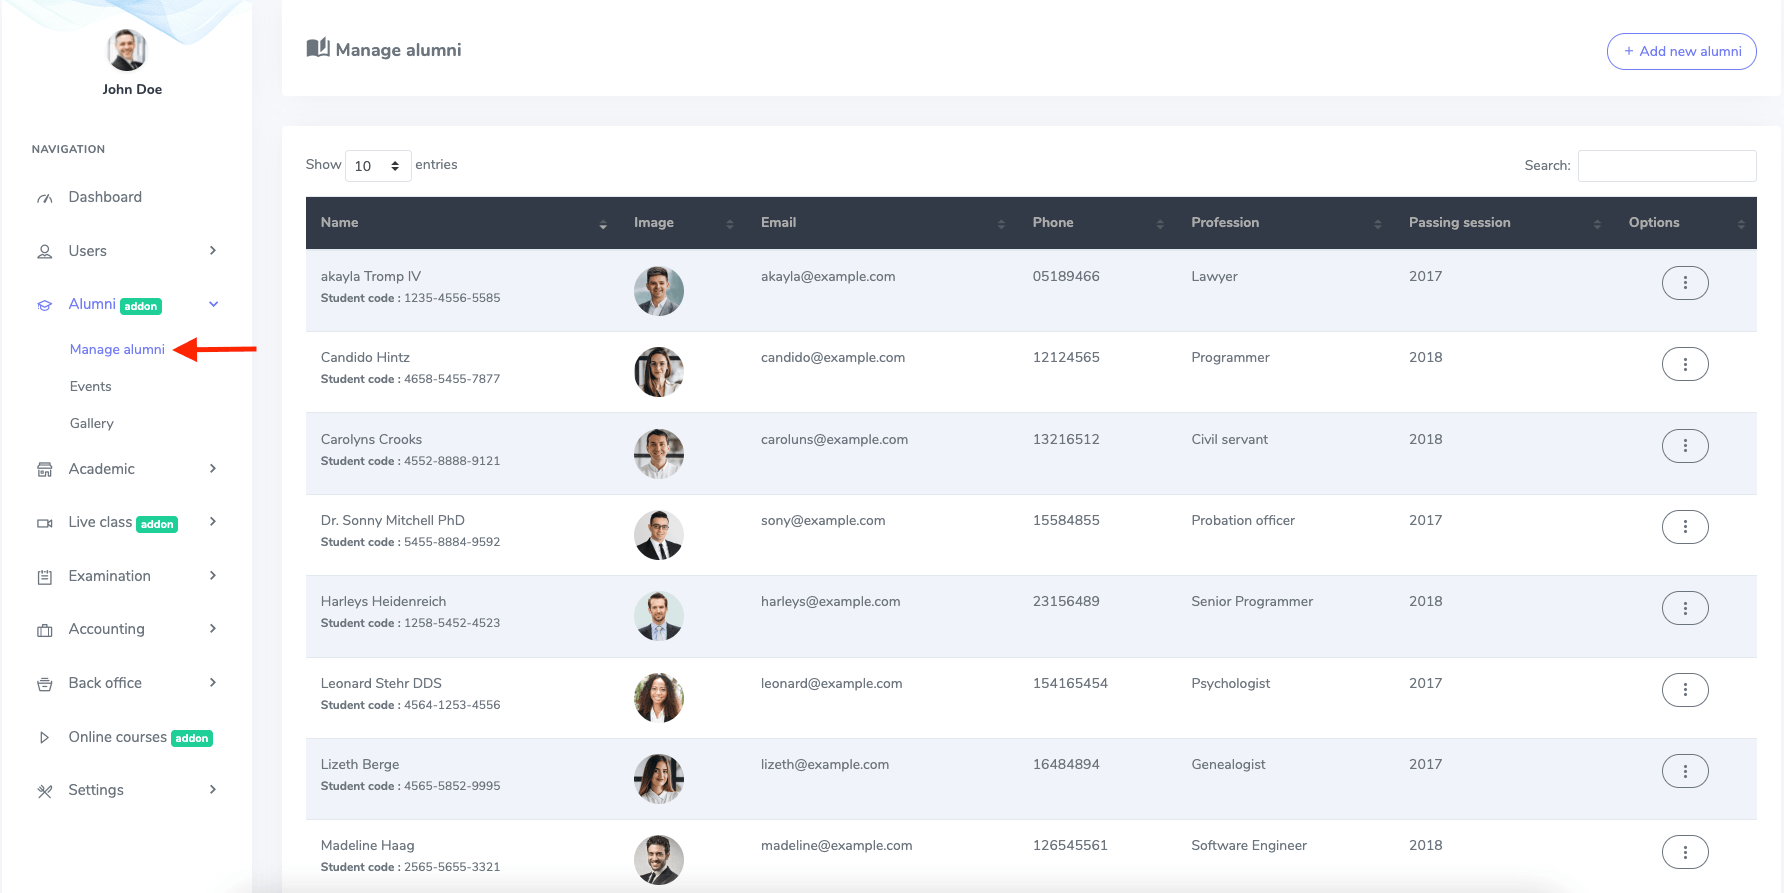
Figure 3. Ekattor ERP Managing Alumni
In this panel, you can overview:
- Name of alumni
- Image
- Phone
- Profession
- Passing year
- "Option" section
To create a new alumni's directory, you have to select the "Add new alumni" button.
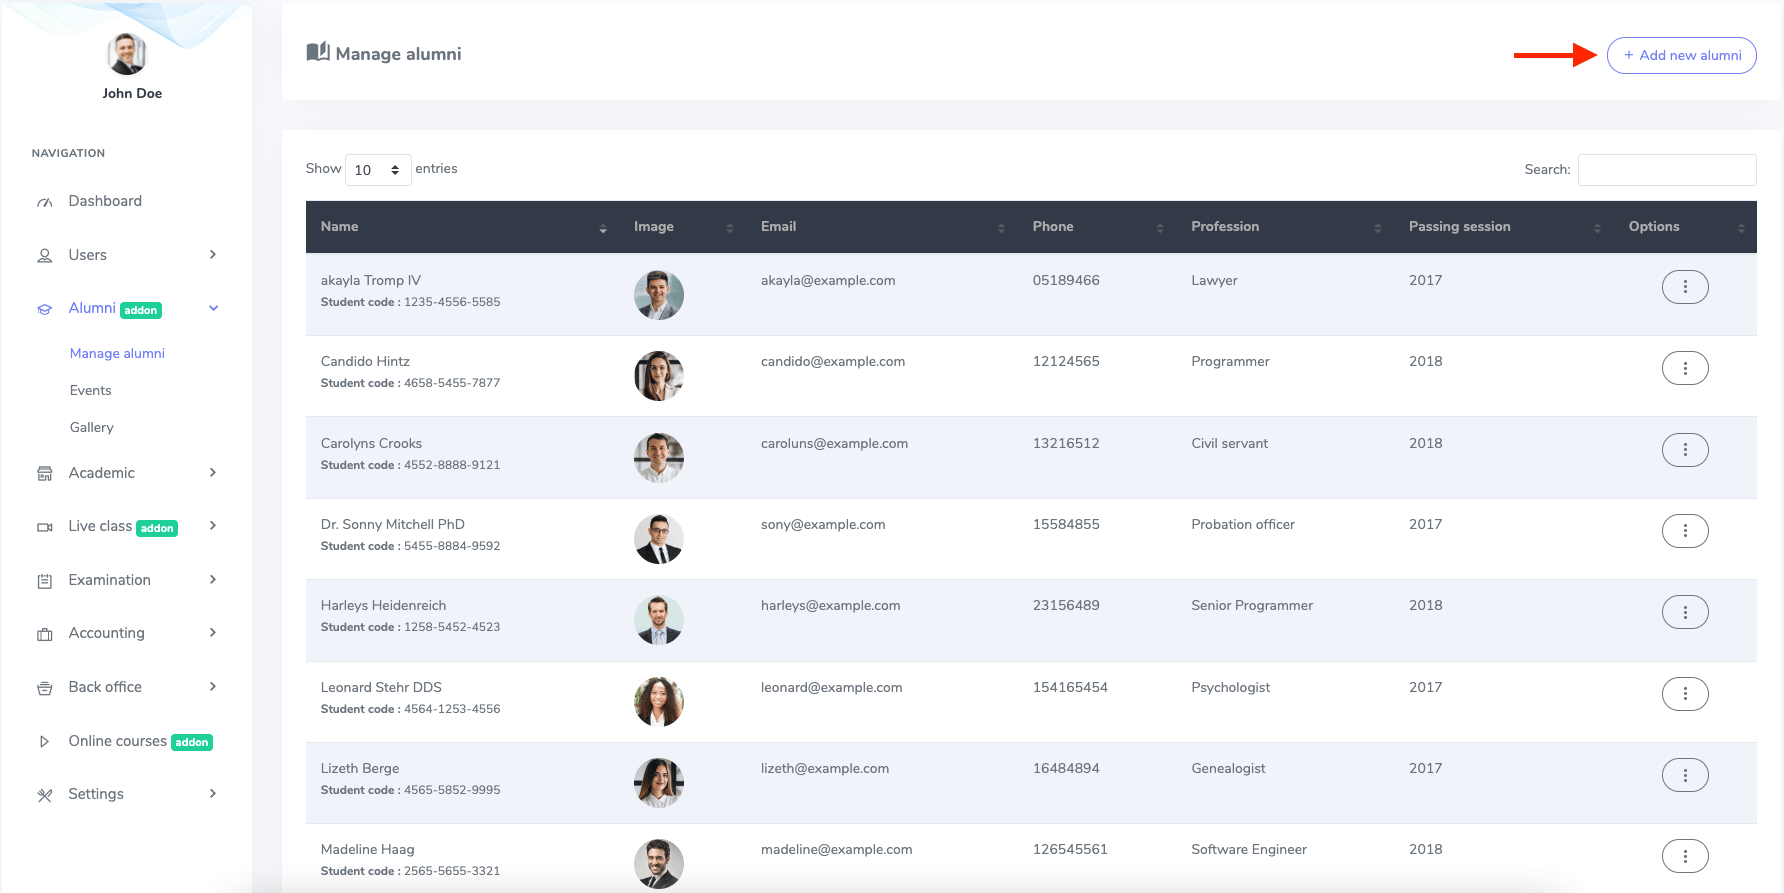
Figure 4. Ekattor ERP Adding New Alumni
Now you have to provide:
- Alumni name
- Student code
- Phone number
- Passing section
- Profession
- Alumni image (You can upload the image from your device)
After providing all information, click on the "Add alumni" button.
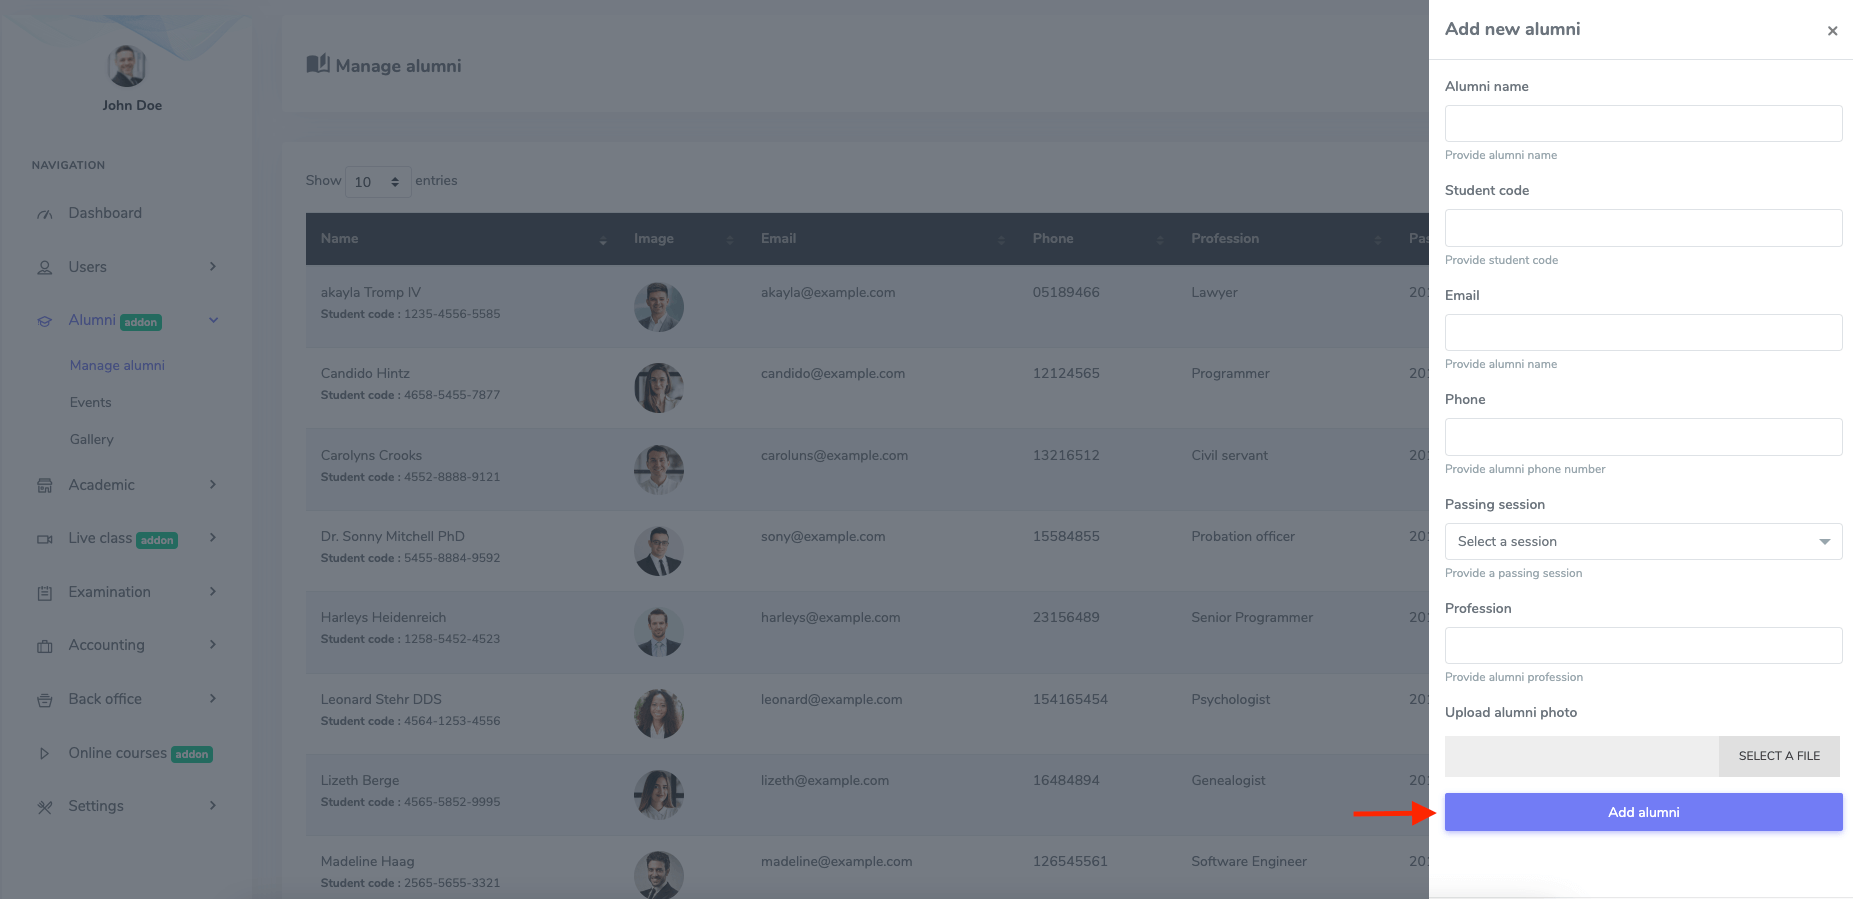
Figure 5. Ekattor ERP Saving New Alumni
To update the alumni's directory, you have to navigate:
- Select alumni.
- Click on the "Edit" button from the "Option."
After that, you have to change:
- Alumni name
- Student code
- Phone number
- Passing section
- Profession
- Alumni image (You can upload the image from your device)
After providing all information, click on the "Update alumni" button to save your data.
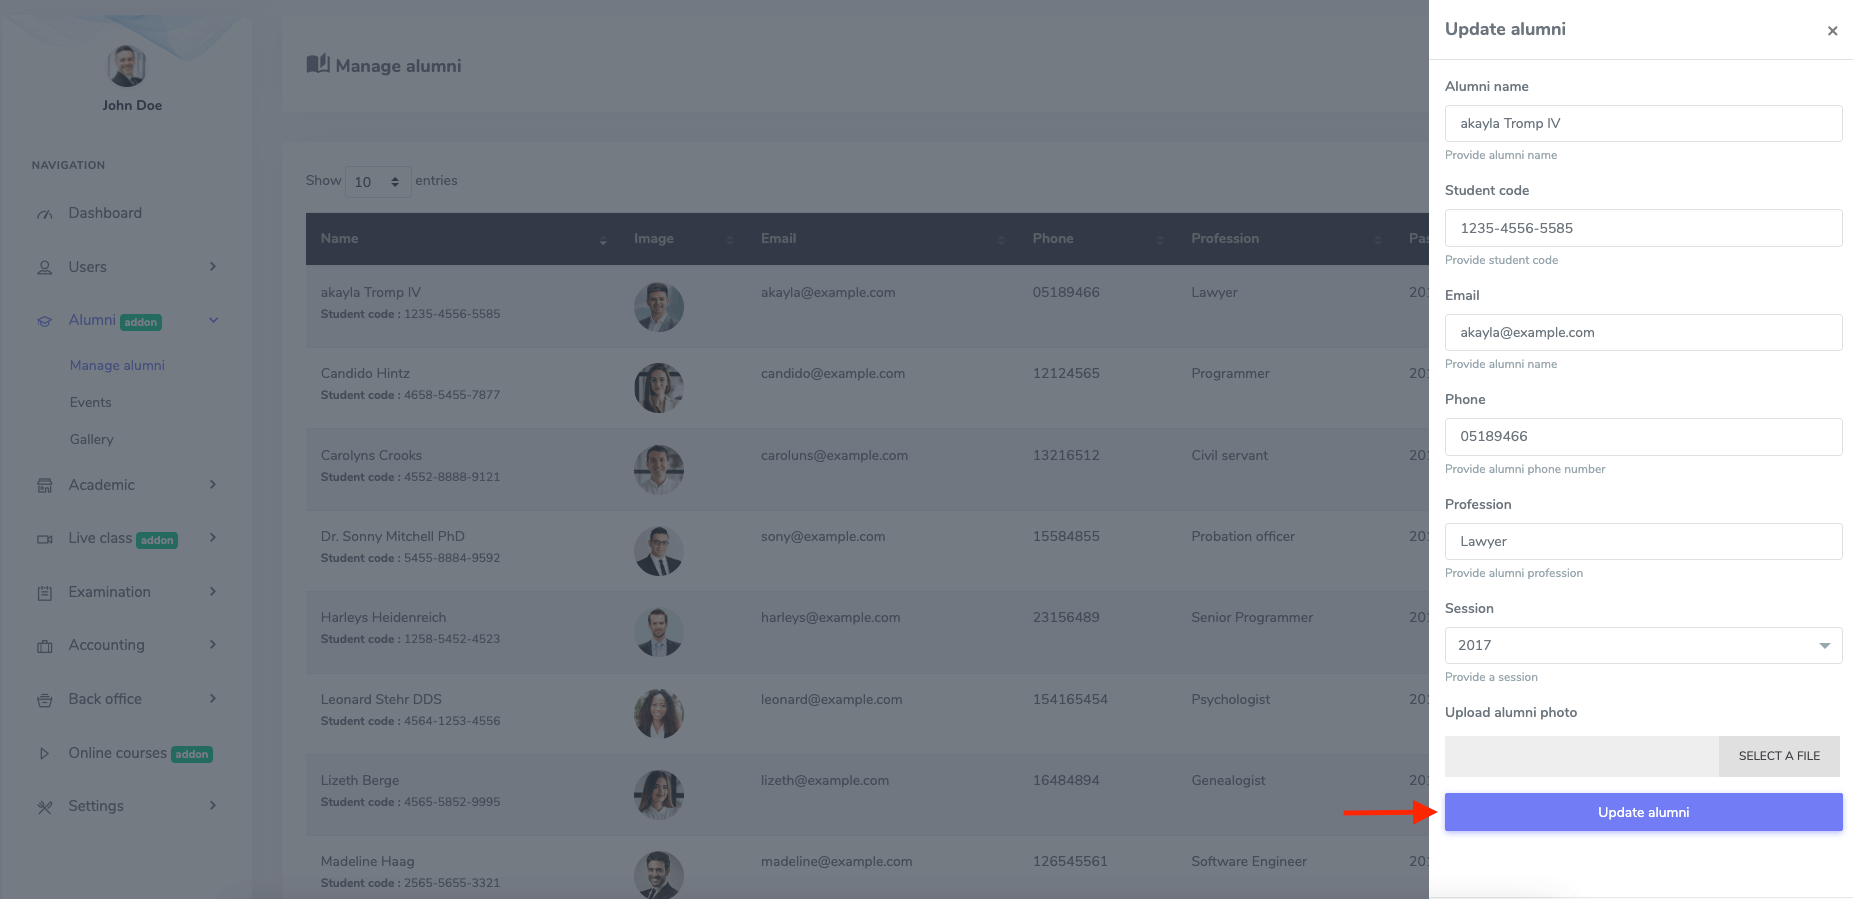
Figure 6. Ekattor ERP Updating Alumni
To delete an alumni's directory, you have to select the "Delete" button from "Option." Now, select the "Continue" button to confirm your action.
In this panel, as a superadmin, you can create events for alumni. For this, you have to navigate:
- Log in to the superadmin panel.
- Select the "Alumni" option from the left menu.
- Choose the "Event" option from the sub-menu.
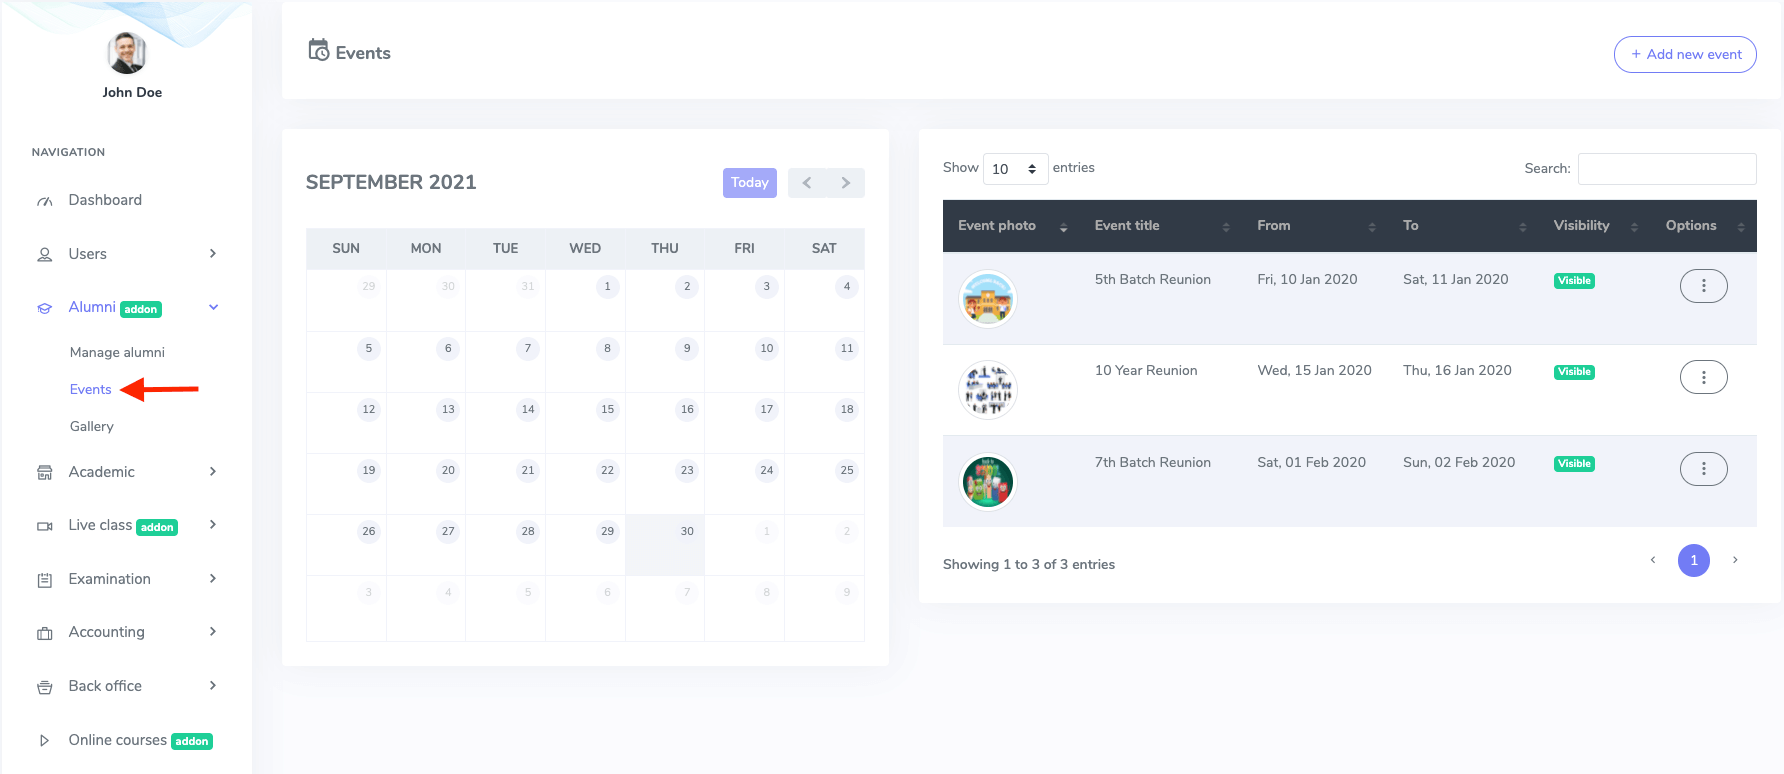
Figure 7. Ekattor ERP Alumni Event
In this panel, you can overview:
- Frontend calendar
- Event list
- Event Photo
- Event title
- Event starting date
- Event finishing date
- Event visibility status
- "Option" section (You can edit and delete the event from here)
If you want to add a new event for alumni, you have to select the "Add new event" option.
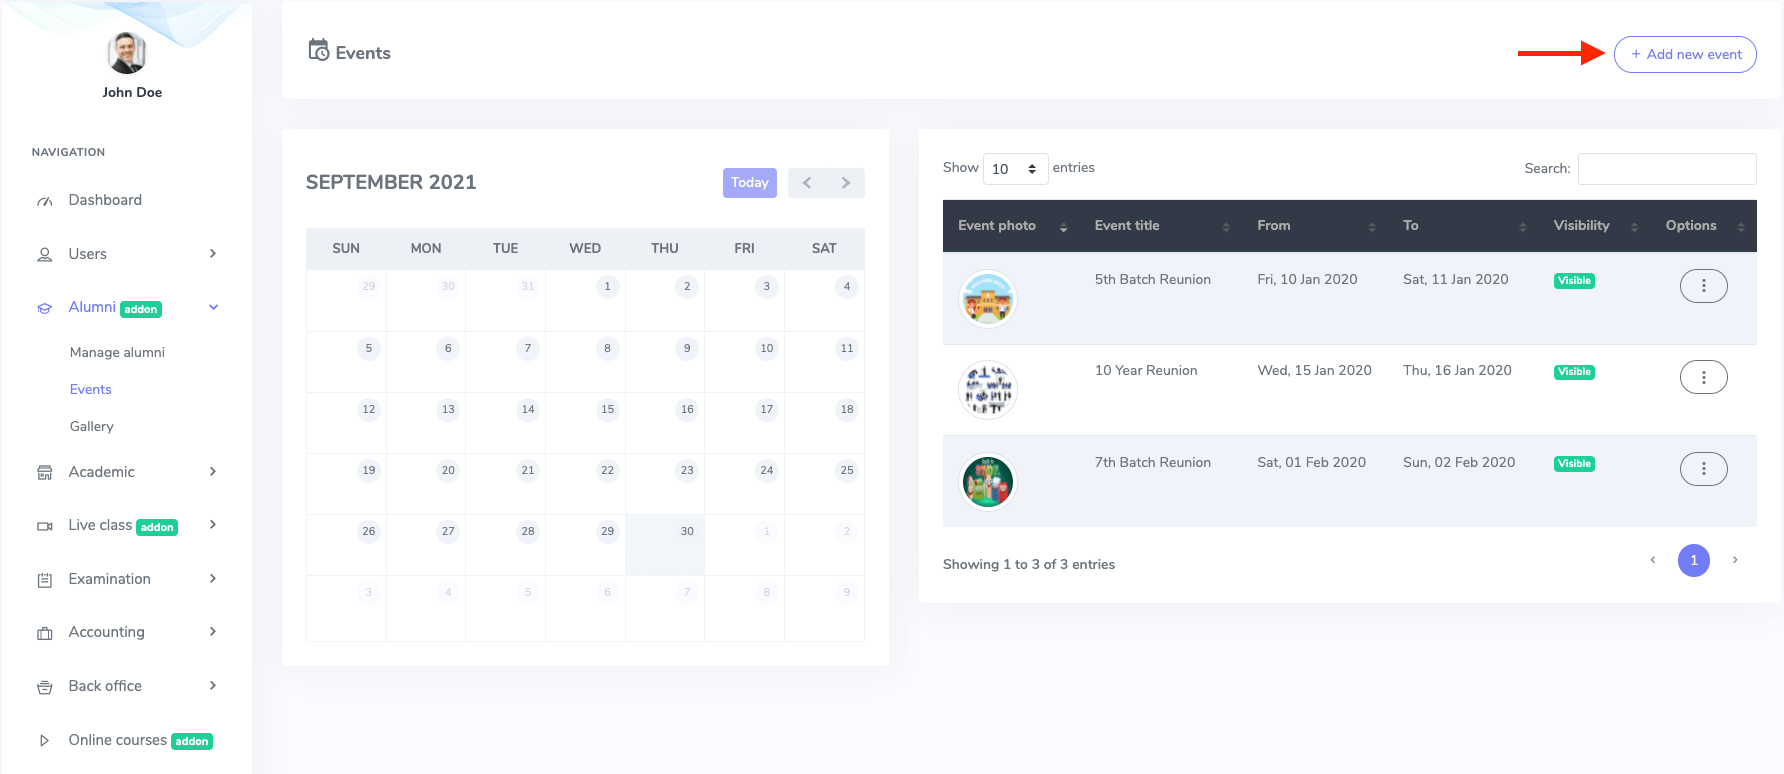
Figure 8. Ekattor ERP Adding New Alumni Event
In this new form, you have to add:
- Event name
- Event starting date
- Event ending date
- Visibility option for frontend
- Event photo (You can upload an image from your device)
Now, select the "Save event" button to save your information.
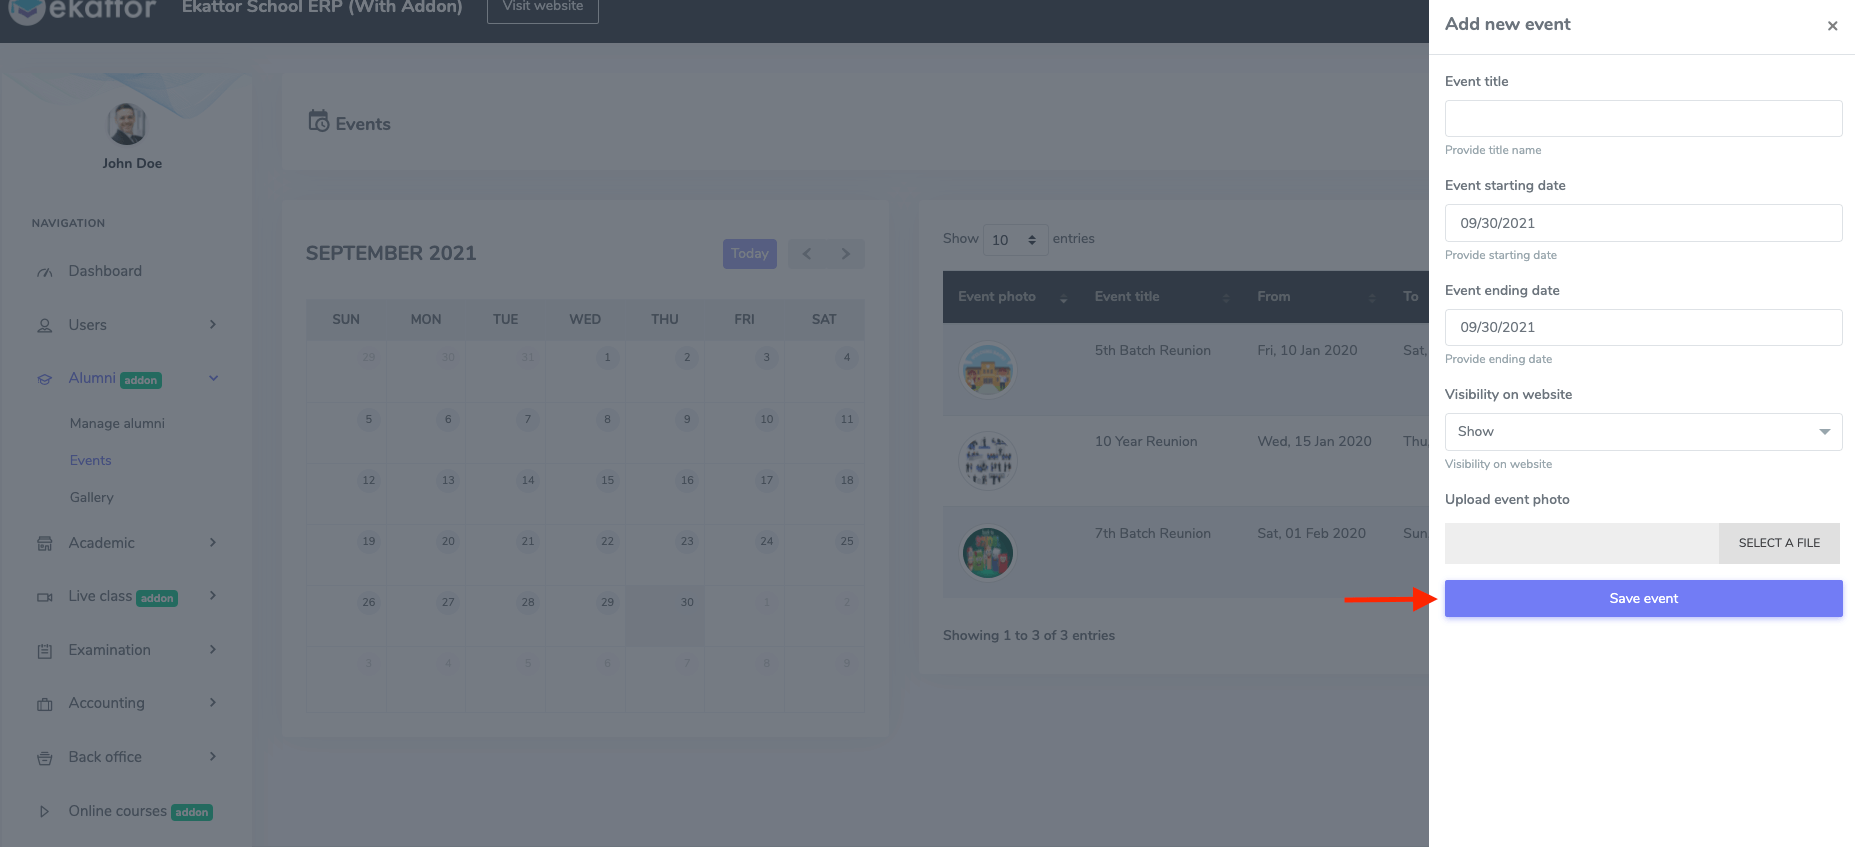
Figure 9. Ekattor ERP Saving New Alumni Event
Note: Your information will show on the frontend of your school website.
To update the alumni event, you have to select the "Edit" button from "Option." Now you have to provide:
- Event name
- Event starting date
- Event ending date
- Visibility option for frontend
- Event photo (You can upload an image from your device)
Now, select the "event" button to save your information.
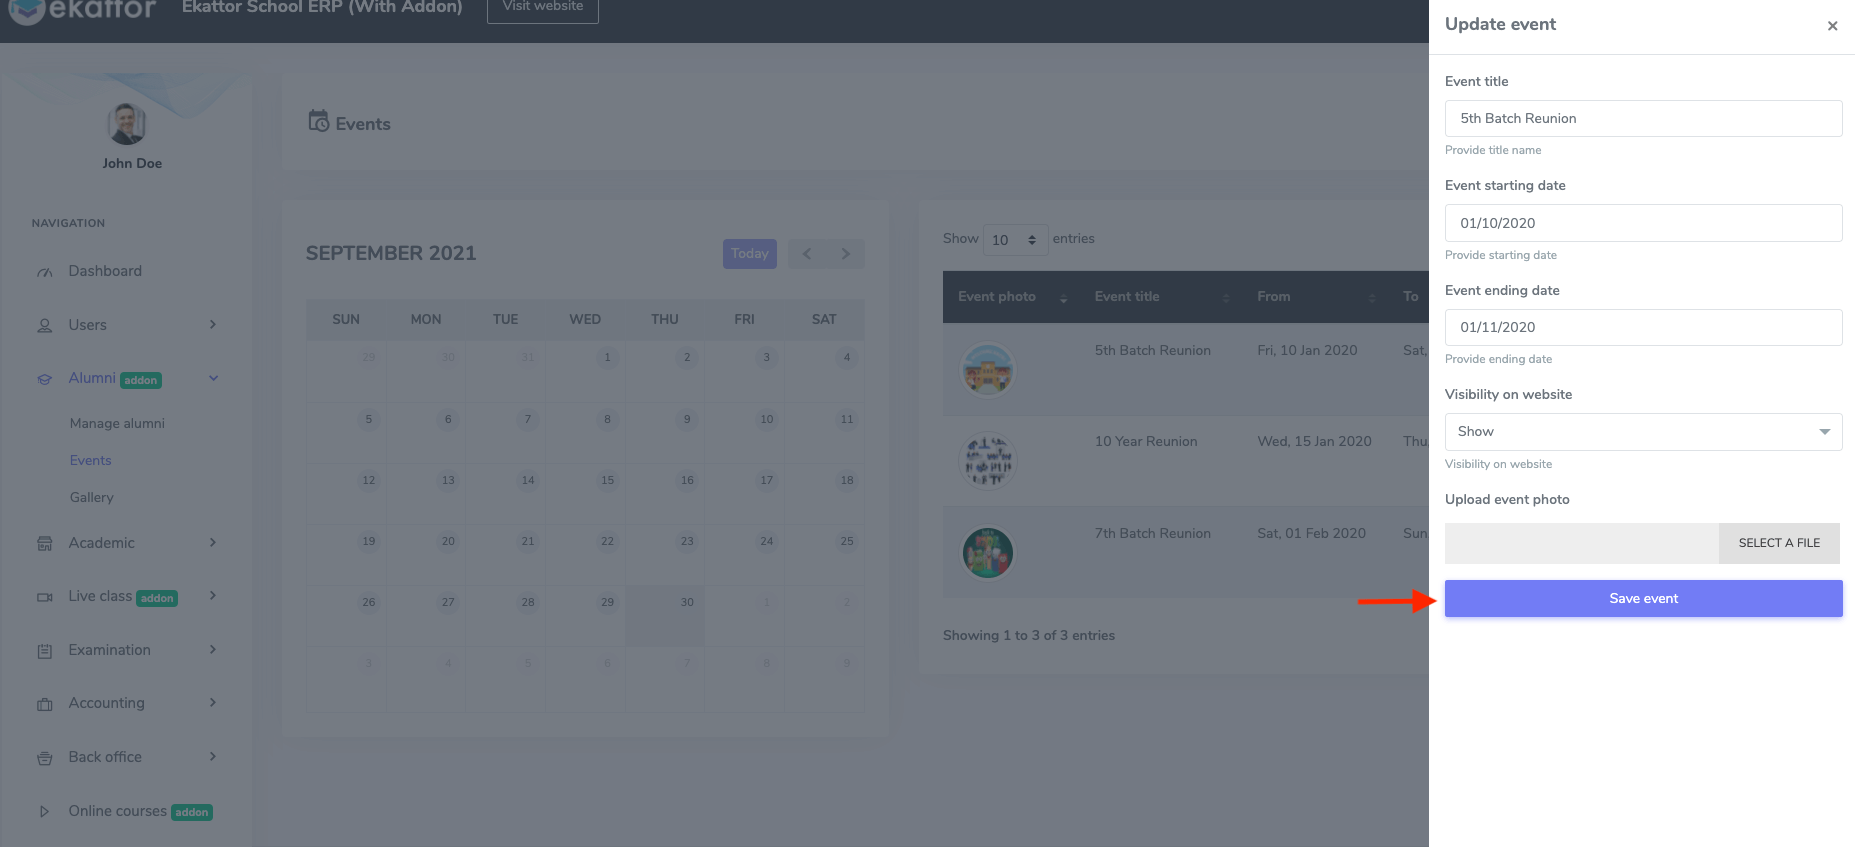
Figure 10. Ekattor ERP Updating Alumni Event
You can also remove the alumni event. All you have to select the "Delete" button from "Option." Then choose the "Continue" button for confirmation.
To add a new gallery or photo for alumni, you have to follow the steps:
- Log in to the superadmin panel.
- Select the "Alumni" option from the left menu.
- Choose the "Gallery" option from the sub-menu.
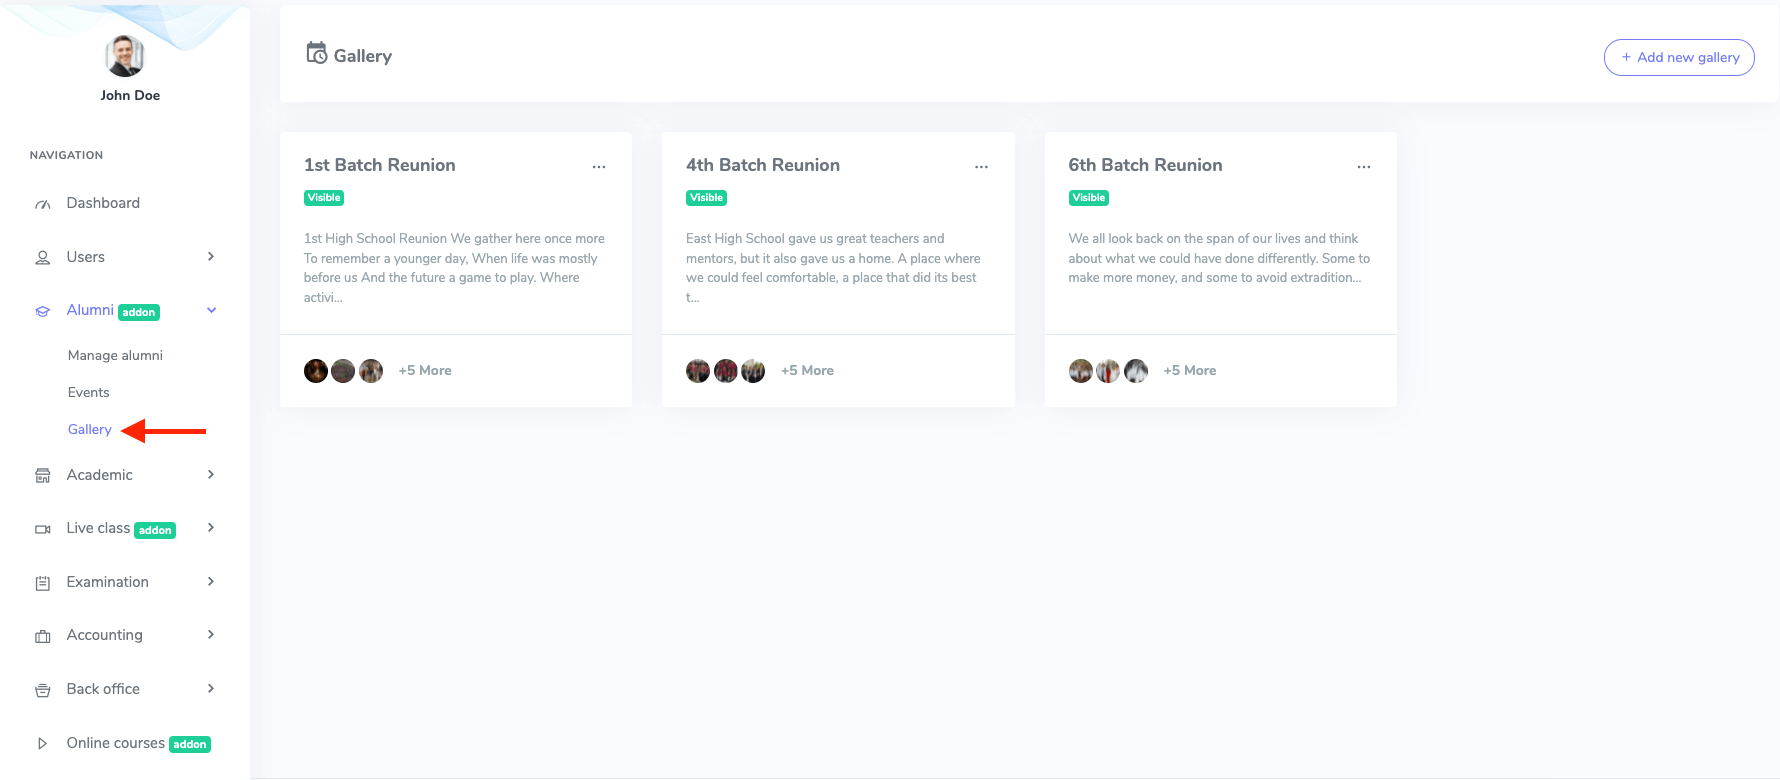
Figure 11. Ekattor ERP Alumni Gallery
To add a new gallery for the alumni, you have to select the "Add new gallery" option.
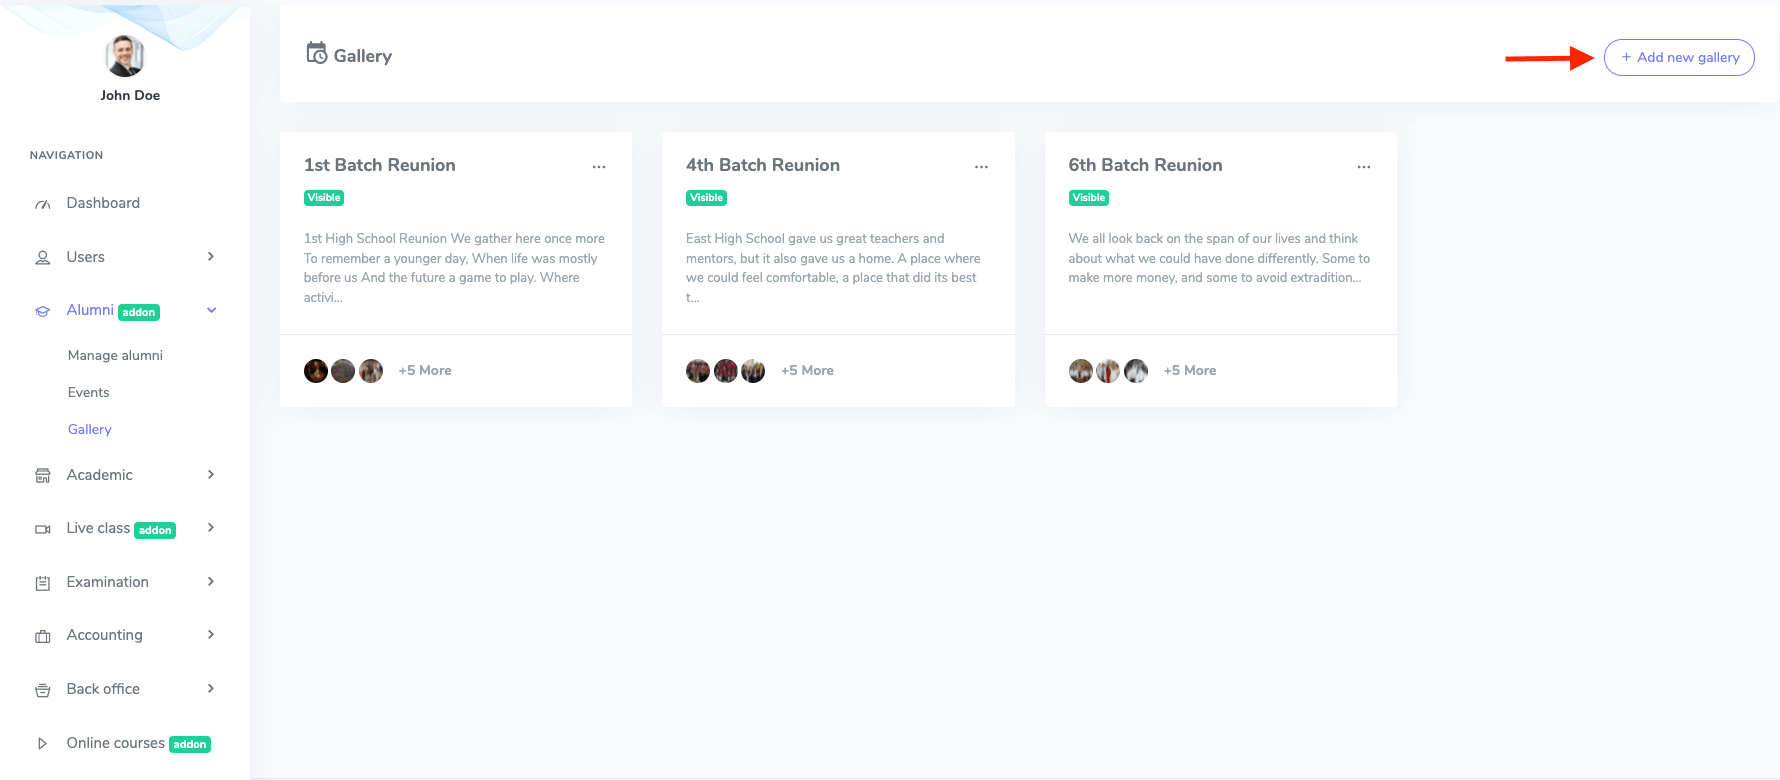
Figure 12. Ekattor ERP Adding New Alumni Gallery
In this new form, you have to provide:
- Gallery title
- Gallery description
- Visibility option for frontend
After that, select the "Save gallery" option.
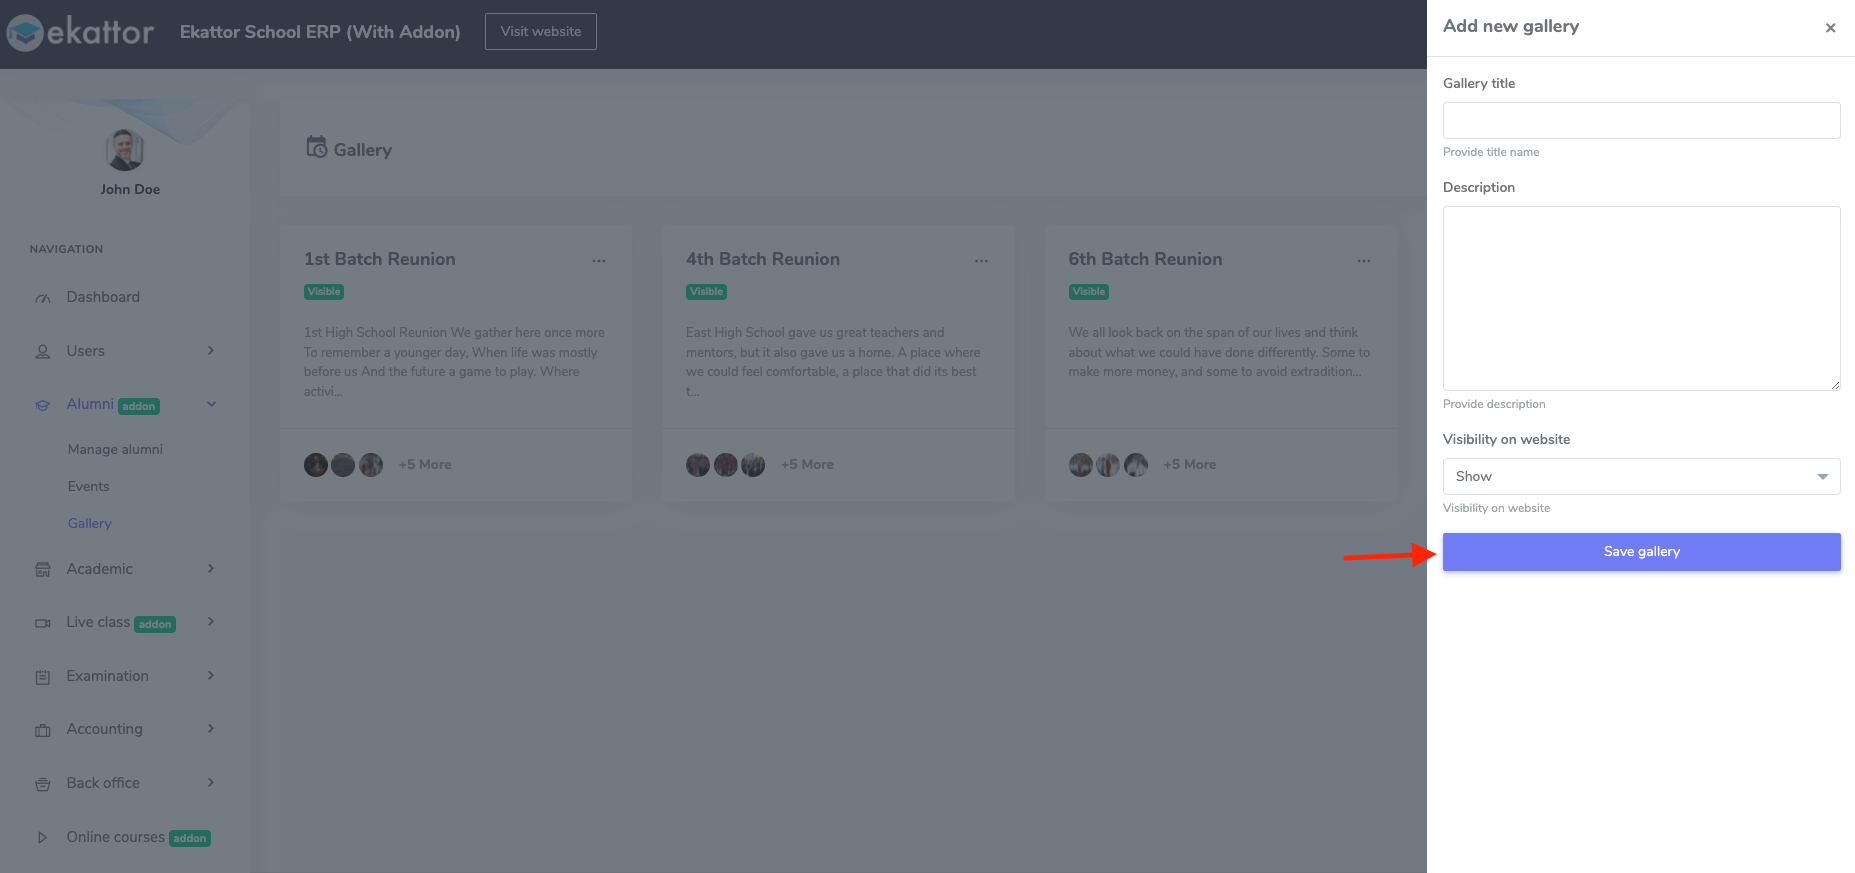
Figure 13. Ekattor ERP Saving New Alumni Gallery
After that, select the "Update gallery" option to save your changes.
In this panel, you can manage the gallery for different batches. For this, you have to select:
- Select an alumni gallery.
- Choose the "Edit" button from "Option."
- Update the required information.
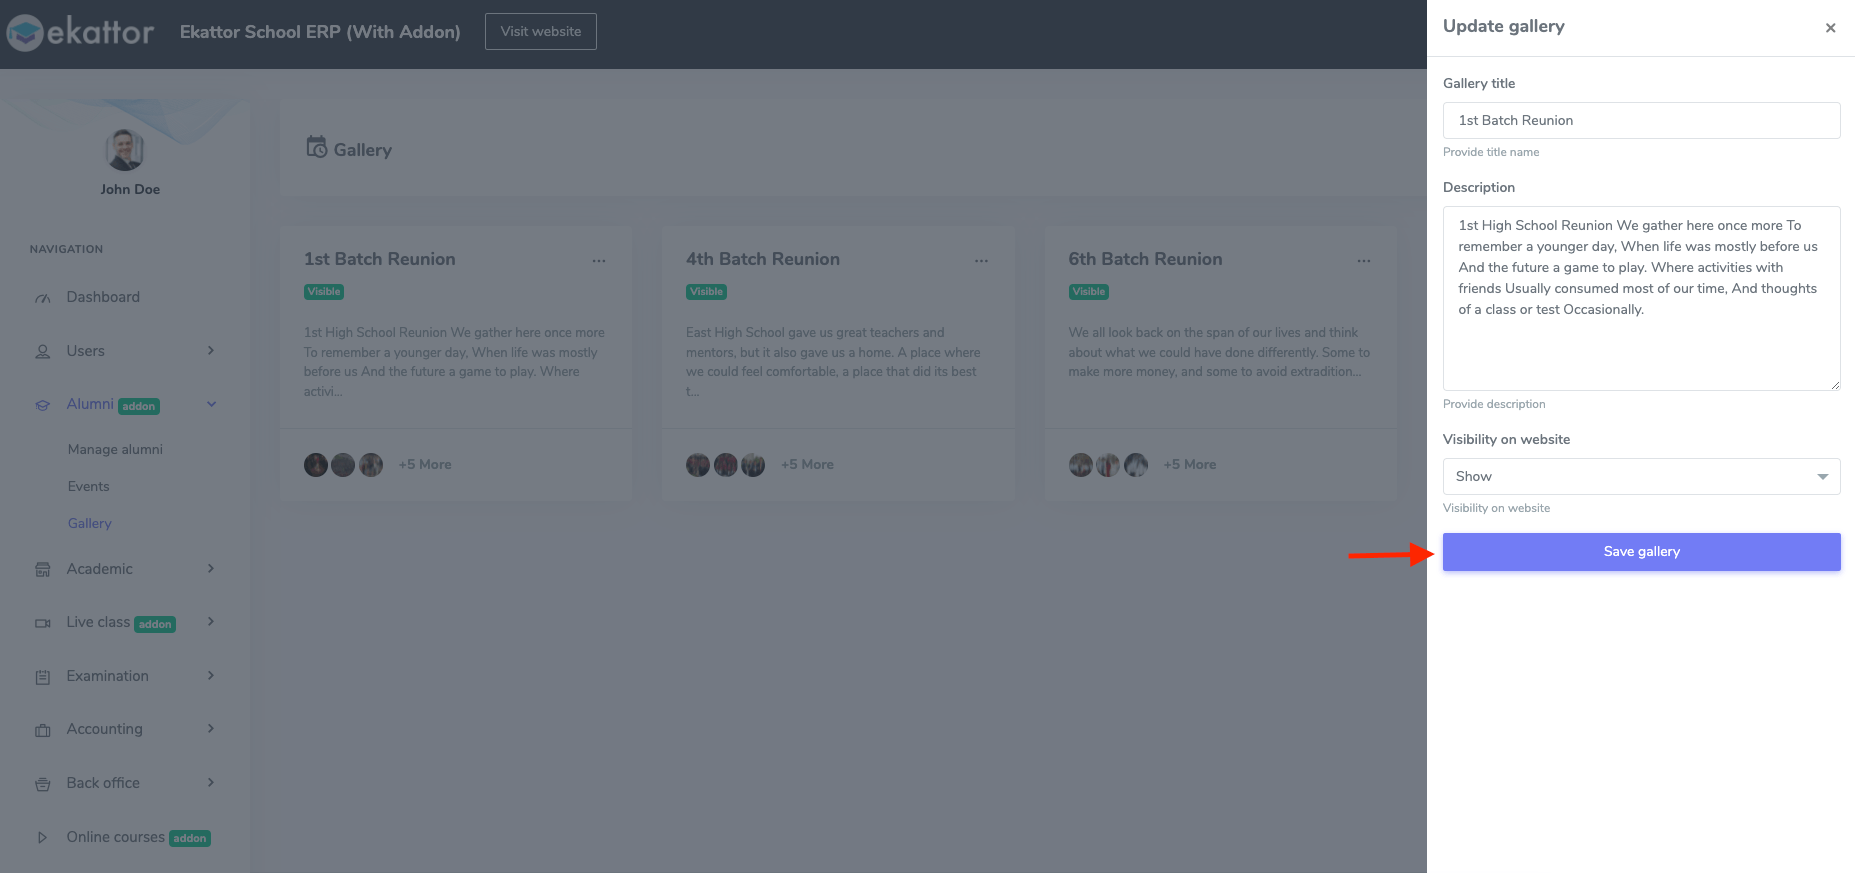
Figure 14. Ekattor ERP Updating Alumni Gallery
You can also upload the image for an individual gallery. After uploading the image, select the "Save to gallery" option.
Note: Your information will show on the frontend of your school website
To remove the alumni's gallery, you have to select the "Delete" button from "Option." Then select the "Continue" button to complete your process.
You can also delete an image from the gallery. For this, you have to click on the "More" button from the gallery.
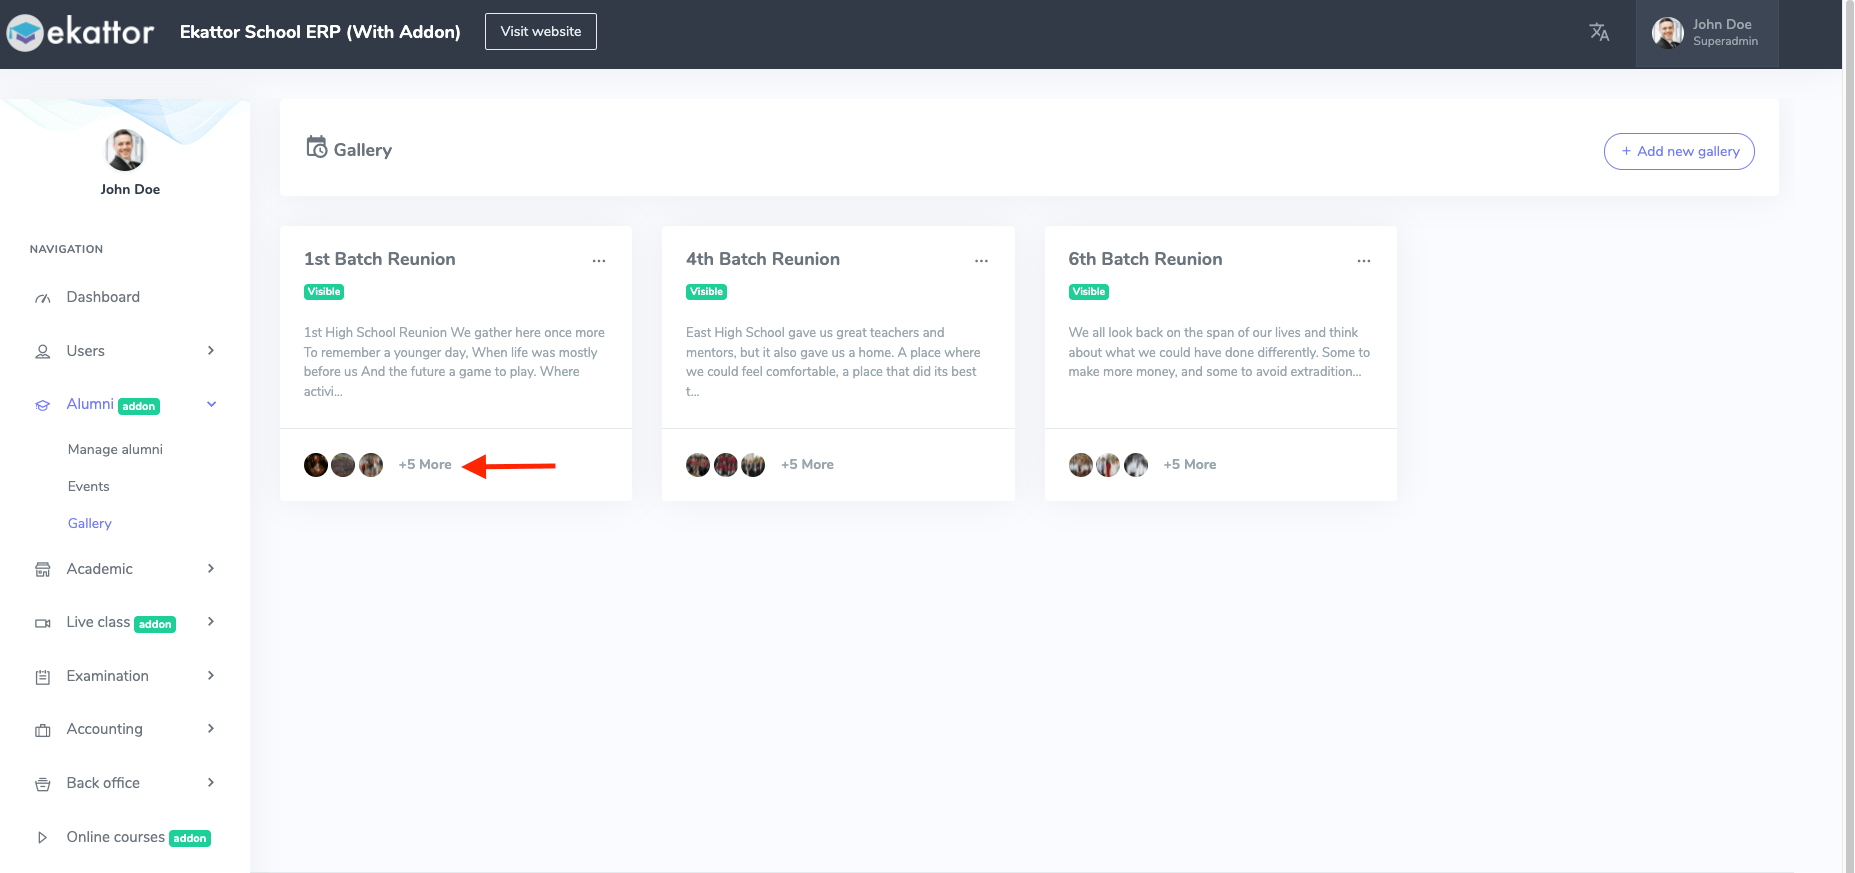
Figure 15. Ekattor ERP Deleting Alumni Photo-1
After that, you have to select the "Delete" button. Then select the "Continue" button for confirmation.
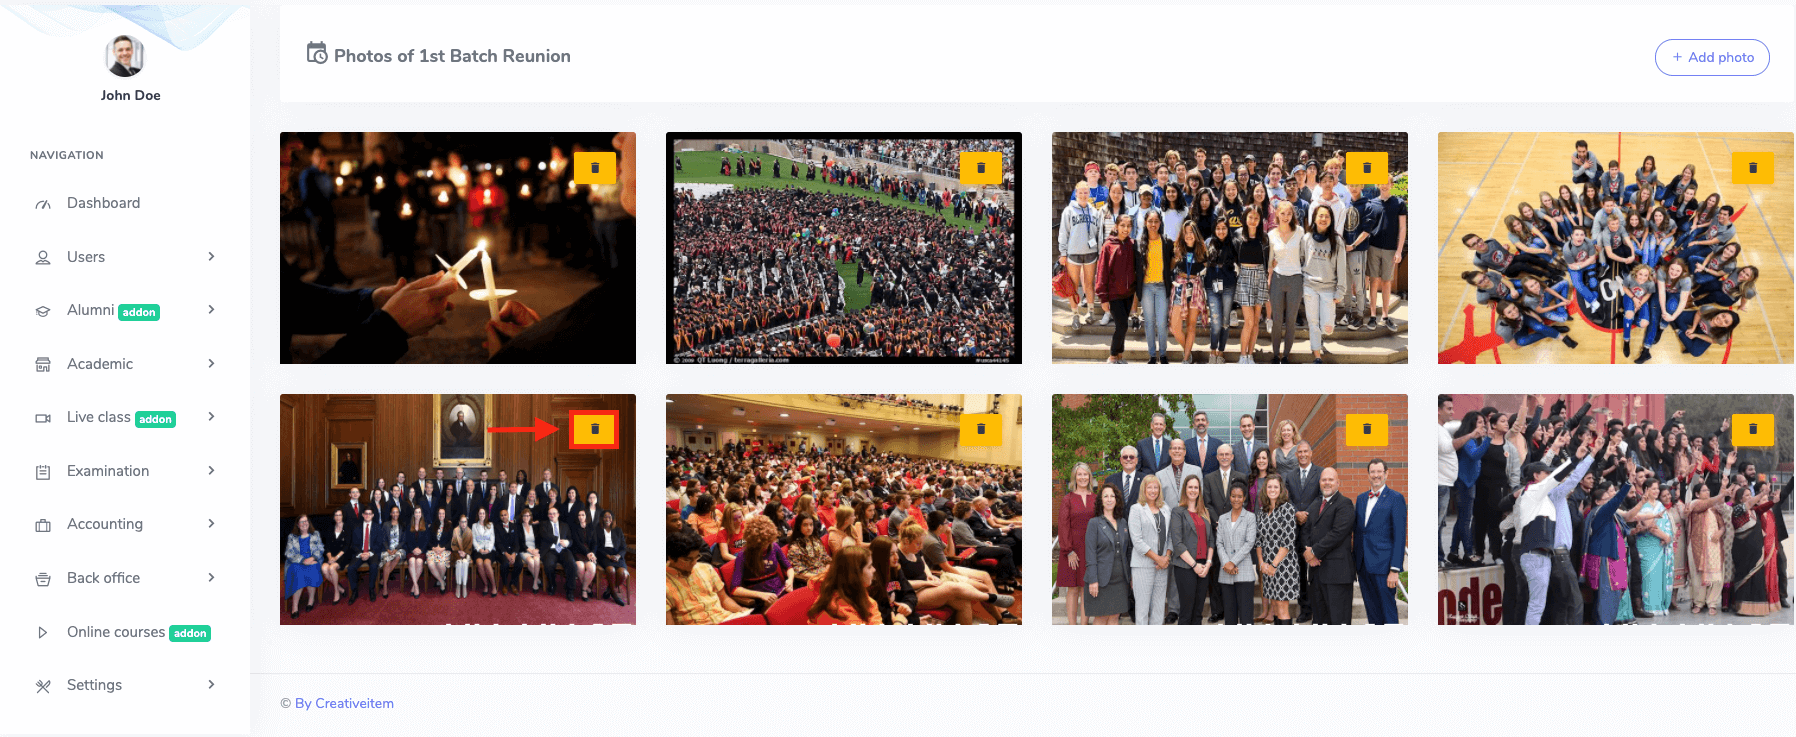
Figure 16. Ekattor ERP Deleting Alumni Photo-2
Contact us and we'll get back to you as soon as possible
