Documentation
-
Introduction
-
Getting started
-
Course management
-
Student’s learning process
-
Earning from course selling
-
Administrative controls
-
Academy LMS Mobile App
-
Installable addons
-
Installable themes
-
Video tutorial
-
FAQ
-
Student Flutter App
- Student mobile application
- Manage account with mobile app
- Purchasing course with mobile app
- Managing wishlist in mobile app
- Course play with mobile app
- Join live class with mobile app
- Offline course play for mobile app
- Join course forum with mobile app
- Purchasing course bundle with mobile app
- Course play from my bundles in mobile app
-
Academy LMS Affiliate addon
-
Blogs
-
Video Subscription Service
- What is Video Subscription Service in Academy LMS
- How to purchase a package from Video Subscription Service
- Configuring the video subscription service with your application
- Adding videos to the subscription service
- Managing my videos on the Video Subscription Service
- Managing my subscription packages on the Video Subscription Service
- Managing domain in the Video Subscription Service
- Managing my profile
-
Creativeitem
Payment settings
After configuring the website settings, you have to manage the payment settings. Here, you can change, update the payment system of your Application. For this, you have to follow the steps below:
- Log in to the admin panel.
- Select the "Settings" option from the left menu.
- Click on the "Payment settings" option from the sub-menu.
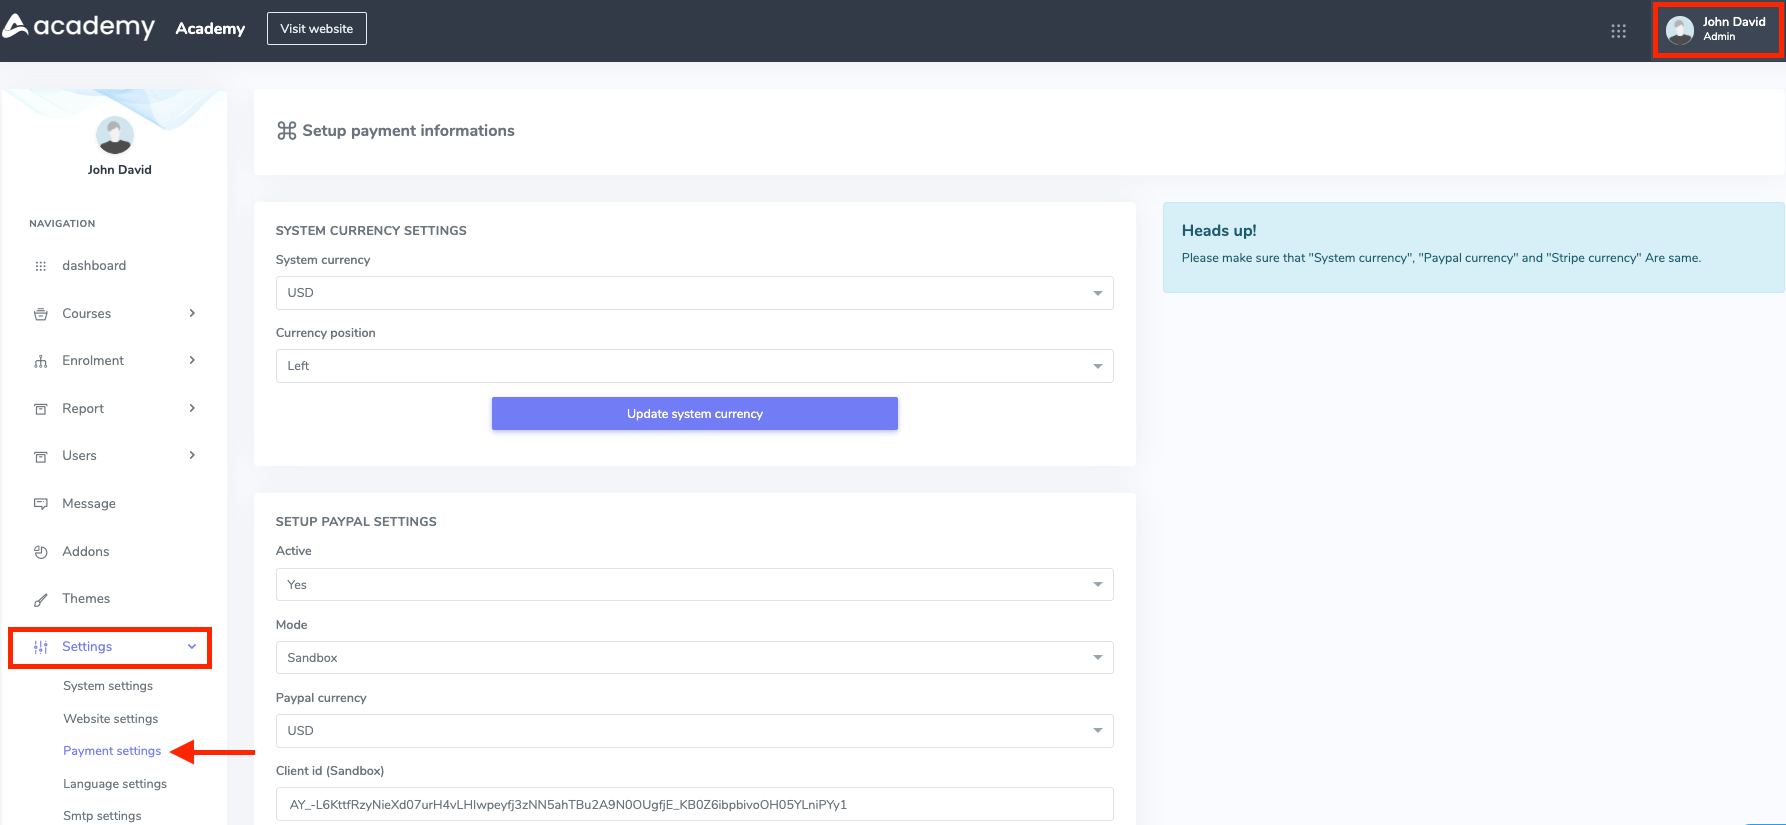
Figure 1. Academy LMS Payment Settings
First of all, you have to configure the system currency. You can set any currency you want. Here, you have to:
- Set a system currency
- Set a currency position
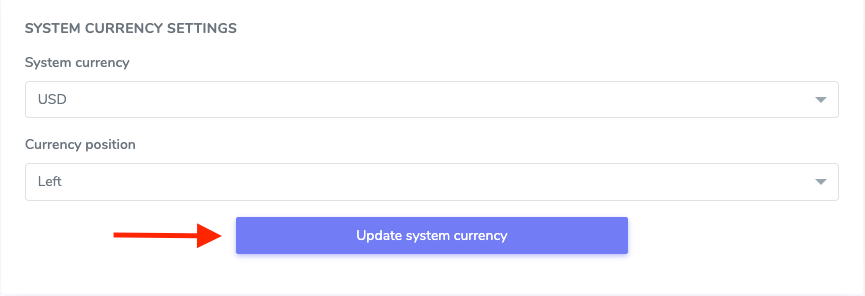
Figure 2. Academy LMS Updating System Currency
Note: Make sure that your "System currency" and other gateway currency are the same.
PayPal gateway:
Secondly, you have to configure the "PayPal settings." For this, you have to:
- Set the activation status of PayPal.
- Select the mode.
- Choose a PayPal currency.
- Provide the client ID. (sandbox)
- Set the secret key. (sandbox)
- Provide the secret ID. (production)
- Choose a secret key. (production)
To save your data, click on the "Update PayPal keys" button.
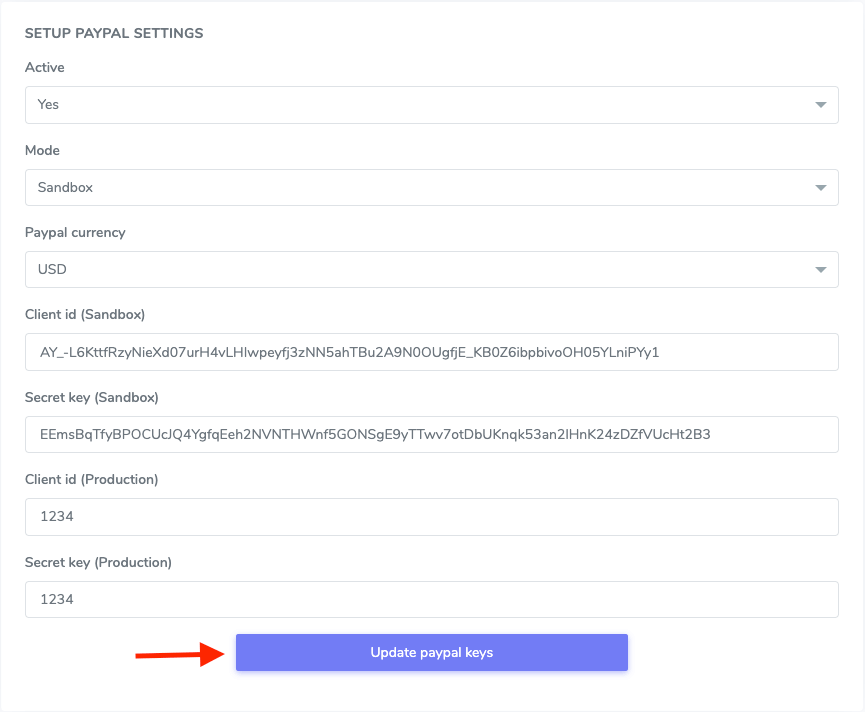
Figure 3. Academy LMS Updating PayPal Keys
To get the "Client ID" and "Secret key" for your PayPal account, you have to follow the steps below:
- Navigate to the "PayPal Developers Website" home page.
- Login to the dashboard.
- You can also log in with your mobile number using OTP.
- Set up the profile.
- Go to the "Your Name" option.
- Go to "Dashboard" in the top right corner.
- Click on the "Create App" to create a new app.
- Provide the details for the new app.
- Now you can see the PayPal Client Id and secret.
Stripe gateway:
Thirdly, you have to set the "Stripe settings." To configure this settings panel, you have to provide:
- Activation status
- Test mode status
- Stripe currency
- Test secret key
- Test public key
- Live secret key
- Live public key
After providing the information, you have to select the "Update Stripe keys" to save your data.
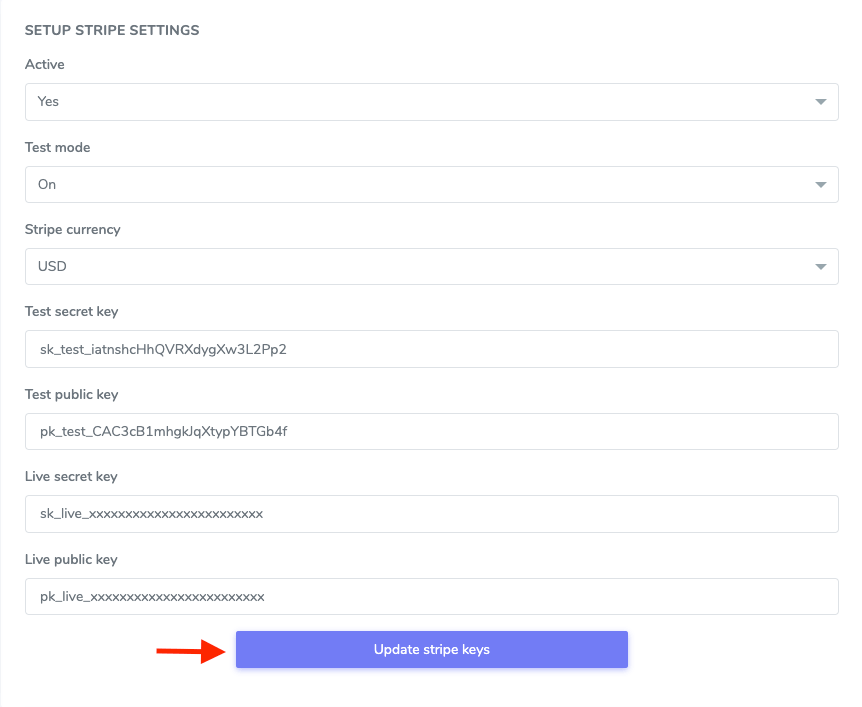
Figure 4. Academy LMS Updating Stripe Keys
To get the Stripe API Keys, please follow the steps below:
- Login to your Stripe dashboard.
- Navigate to the API option from the left menu.
- Toggle the option that says "Viewing test data."
- Click on the "Viewing live data."
- Select the "Reveal live key token" option.
- Now you can see the Stripe keys.
RazorPay gateway:
Fourthly, you have to update the "RazorPay settings." To manage this settings panel, you have to:
- Set the activation status.
- Select a currency.
- Provide the key ID.
- Provide the secret key.
- Choose a theme color. (You can customize the color)
Now, click on the "Update RazorPay keys" button to update your data.
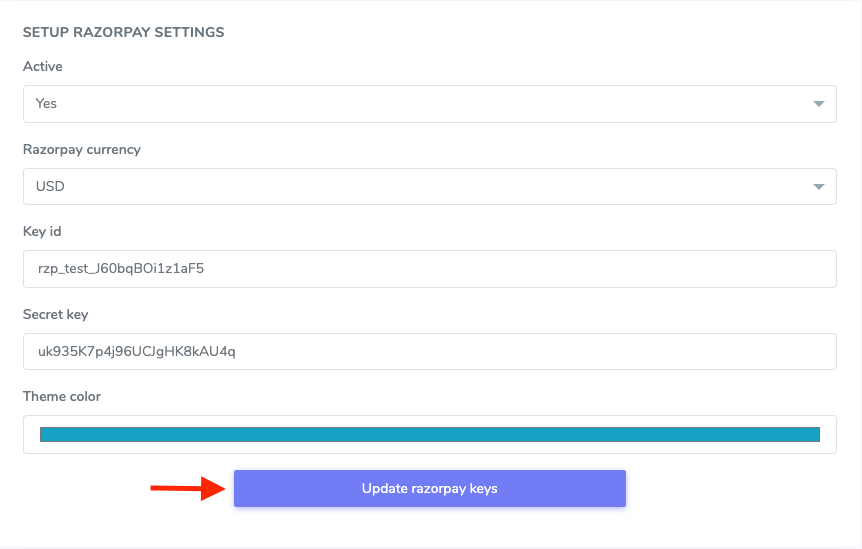
Figure 5. Academy LMS Updating Razorpay Keys
To get the RazorPay keys, you have to follow the steps:
- Log in to the Dashboard.
- Select the mode.
- Go to the "Settings" option.
- Select the "API keys" option.
- Click on the "Generate Key."
Congratulation! your payment settings are all set.
Contact us and we'll get back to you as soon as possible
