Frontend settings
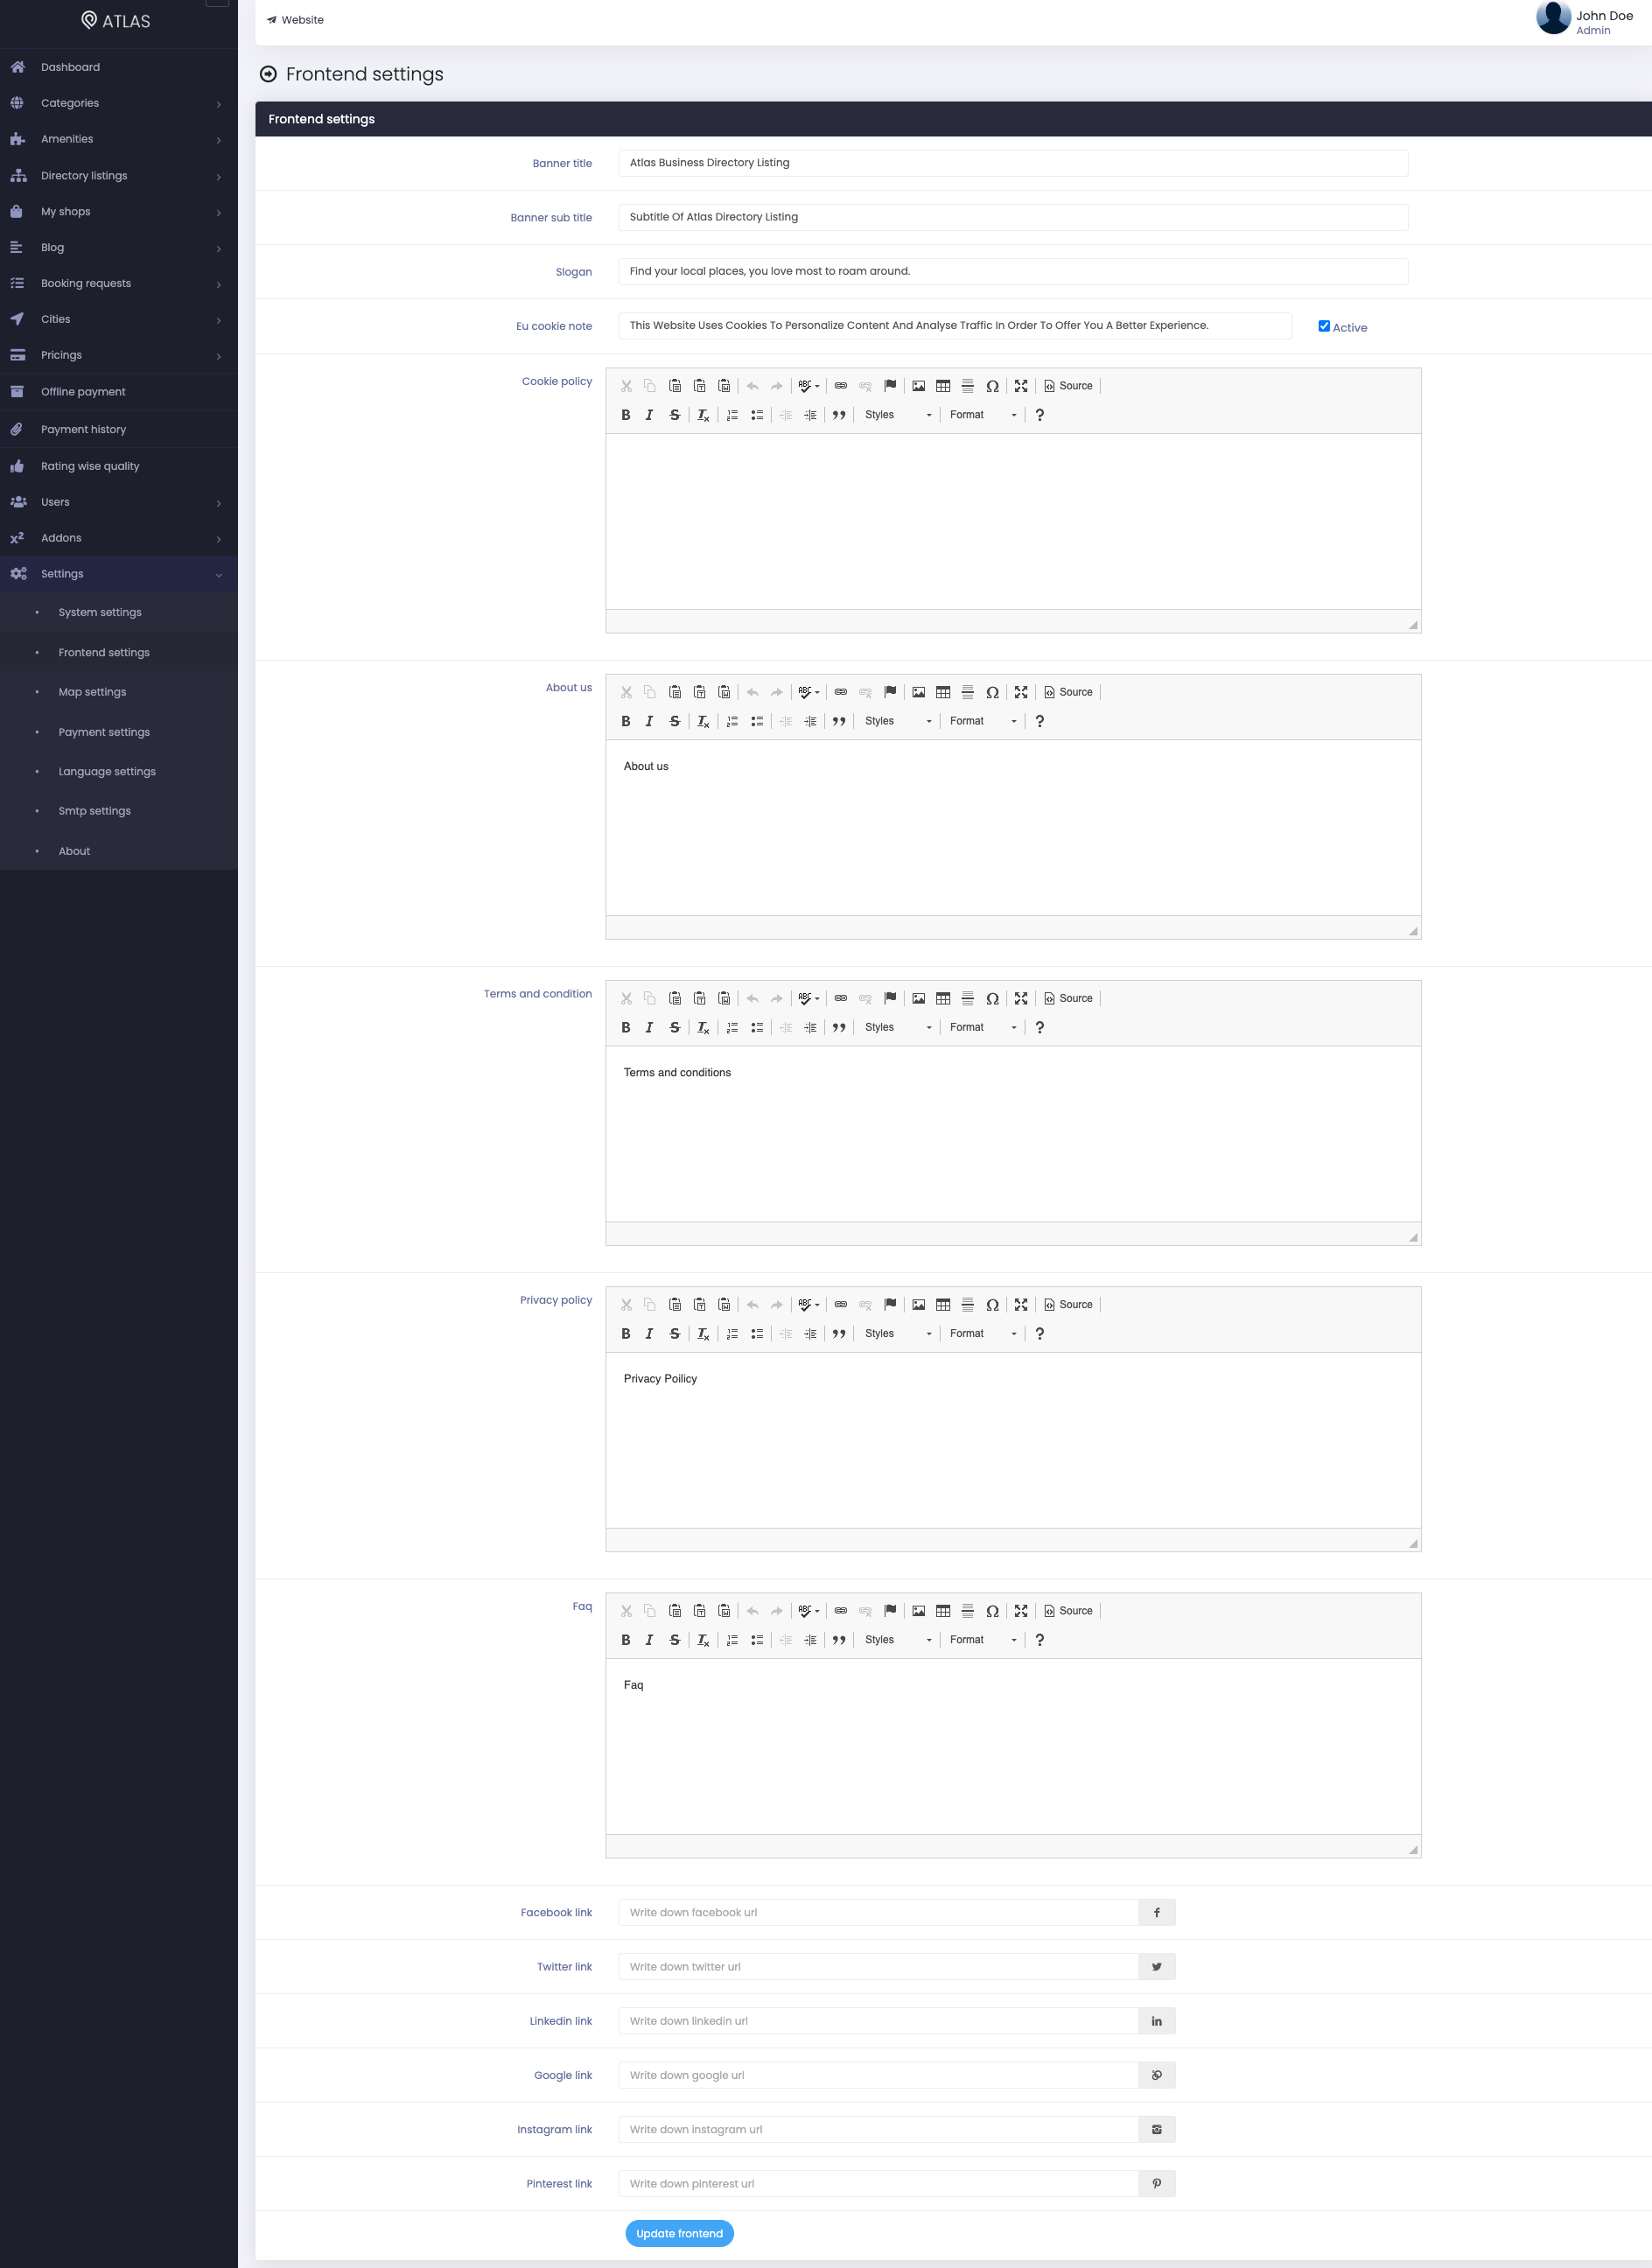
As an admin, you can manage your website's contents, images, and information in Atlas. You can configure your website's frontend in the "Frontend settings" option. You can also configure the Hero section. To update the frontend settings, you can follow the steps below:
- Login to the website as an admin.
- Select the "Settings" option from the left menu.
- Click on the "Frontend settings" option from the sub-menu.
- Provide your website's banner title.
- Provide banner's sub-title.
- Add your website's slogan.
- Add cookie note.
- Provide your website's cookie policy.
- Write down something about your website.
- Add terms and conditions.
- Write down the privacy policy.
- Provide FAQs of your website for your customers.
- Add all social media links. (Facebook, Twitter, Linkedin, Google, Instagram, Pinterest)
- Click on the "Update frontend" button to save your configuration.

Figure 1. Atlas Updating Frontend Settings
Hero Settings:
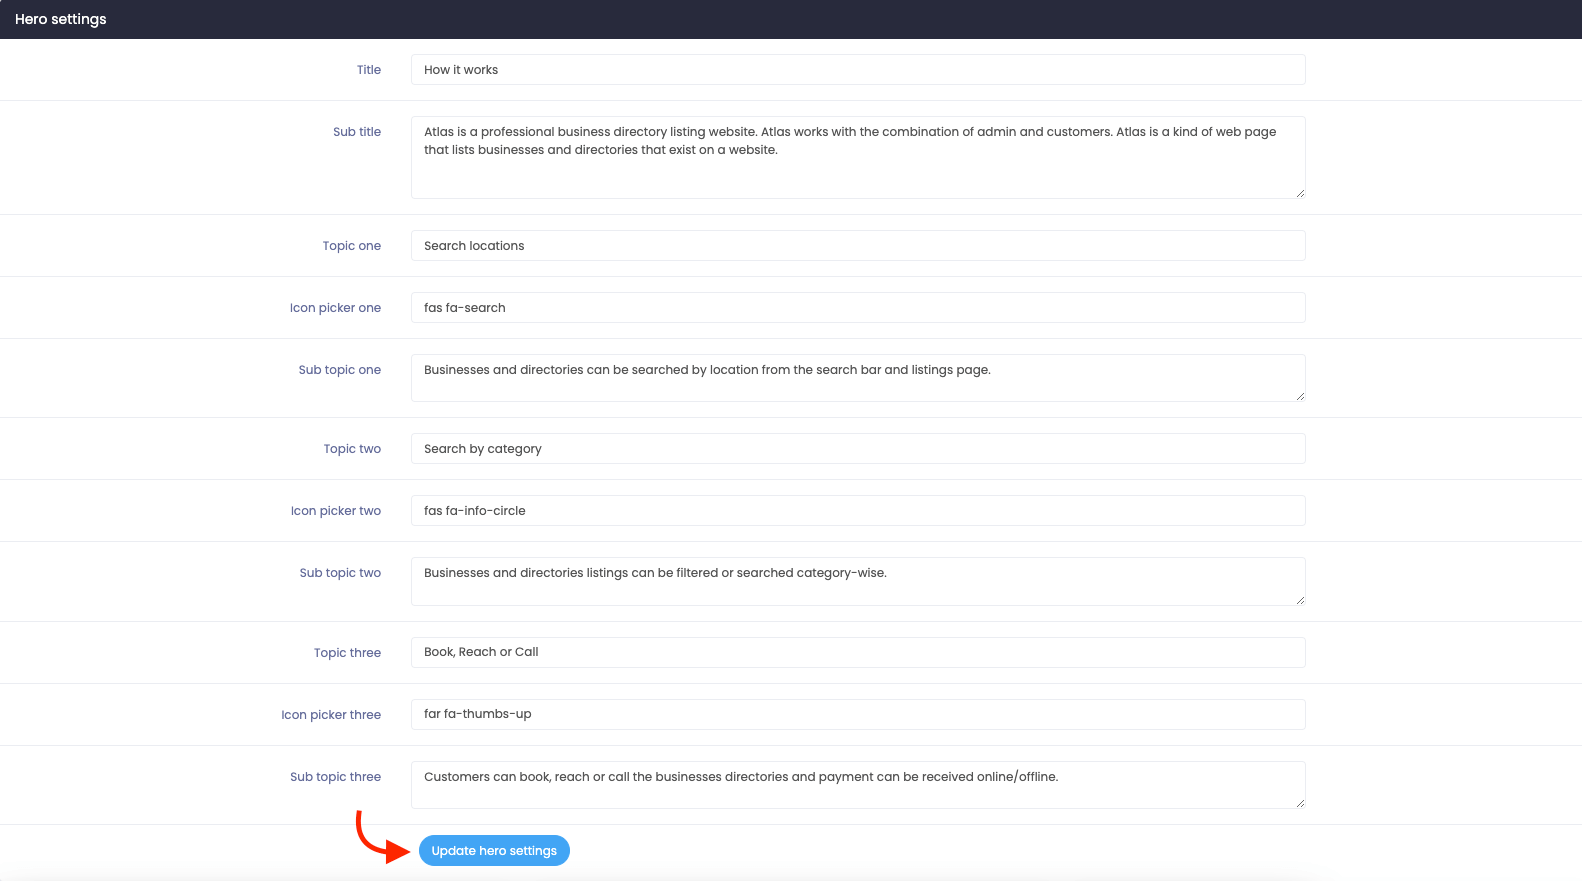
To configure the hero settings, you can provide the information below:
- Add title.
- Add sub title.
- Set topic one.
- Set icon picker one.
- Add sub topic one.
- Set topic two.
- Set icon picker two.
- Add sub topic two.
- Set topic three.
- Set icon picker three.
- Add sub topic three.
- Click on the "Update hero settings" option to save the settings.

Figure 2. Atlas Updating Hero Settings
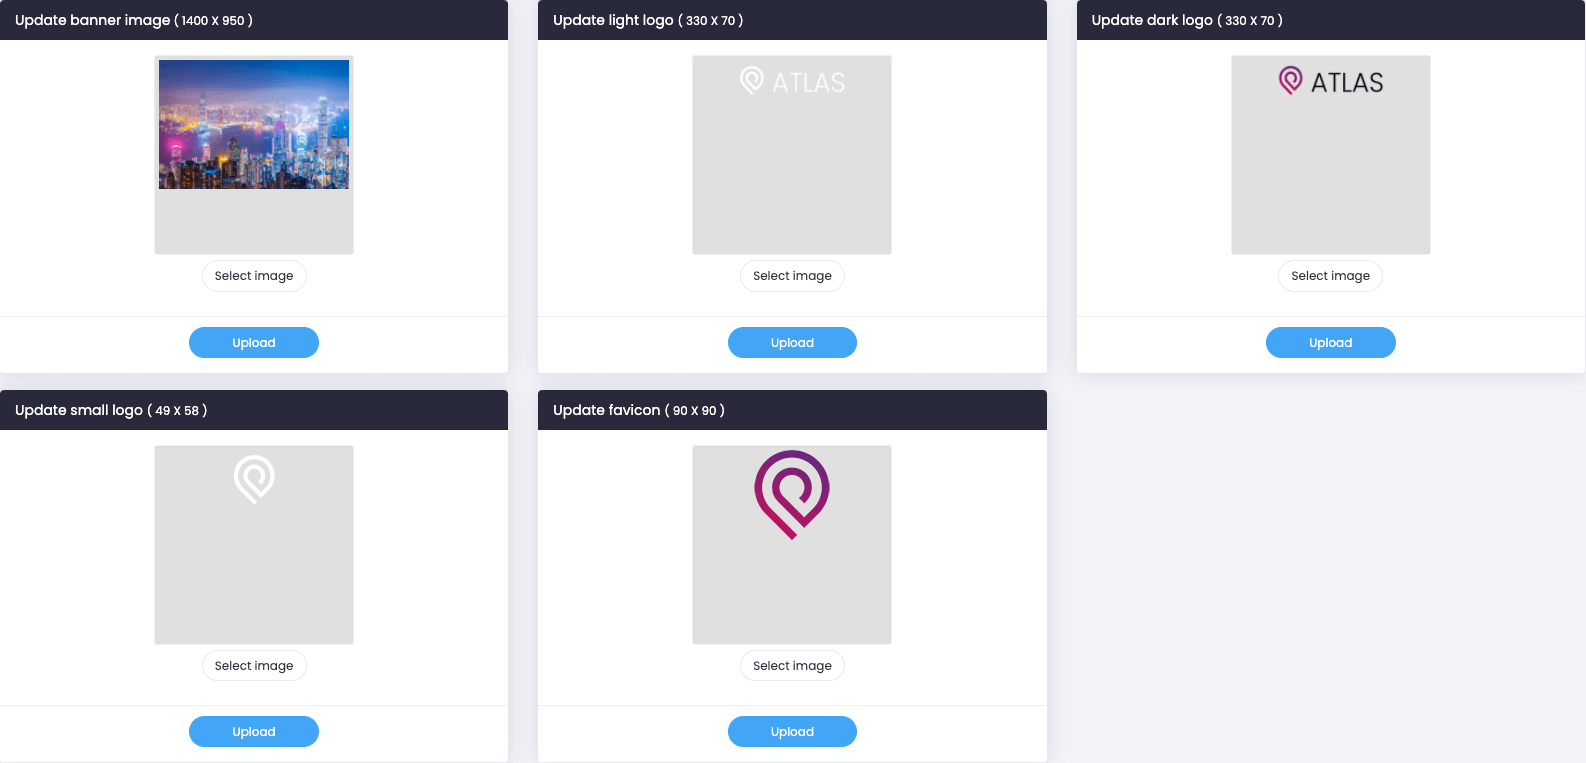
You can also update your website's banner, light and dark logo, small logo, and favicon. After uploading the logo or image, click on the "Upload" button to save your data.

Figure 3. Atlas Uploading Images & Logos
Note: You can choose the images or logos from your device.
How can we help?
Contact us and we'll get back to you as soon as possible
