How to add the directory
You can add a new directory in Atlas as an Admin. You can update, edit, delete, change activation status, mark as featured, and verify if you want. Also, you can manage reported directories. You can filter your directories by activation status, users, and verification status.
Adding new directory
To add a new directory, you can follow the steps below:
- Login to the website as an admin.
- Select the "Directory listings" from the left menu.
- Click on the "Add new directory" from the sub-menu.
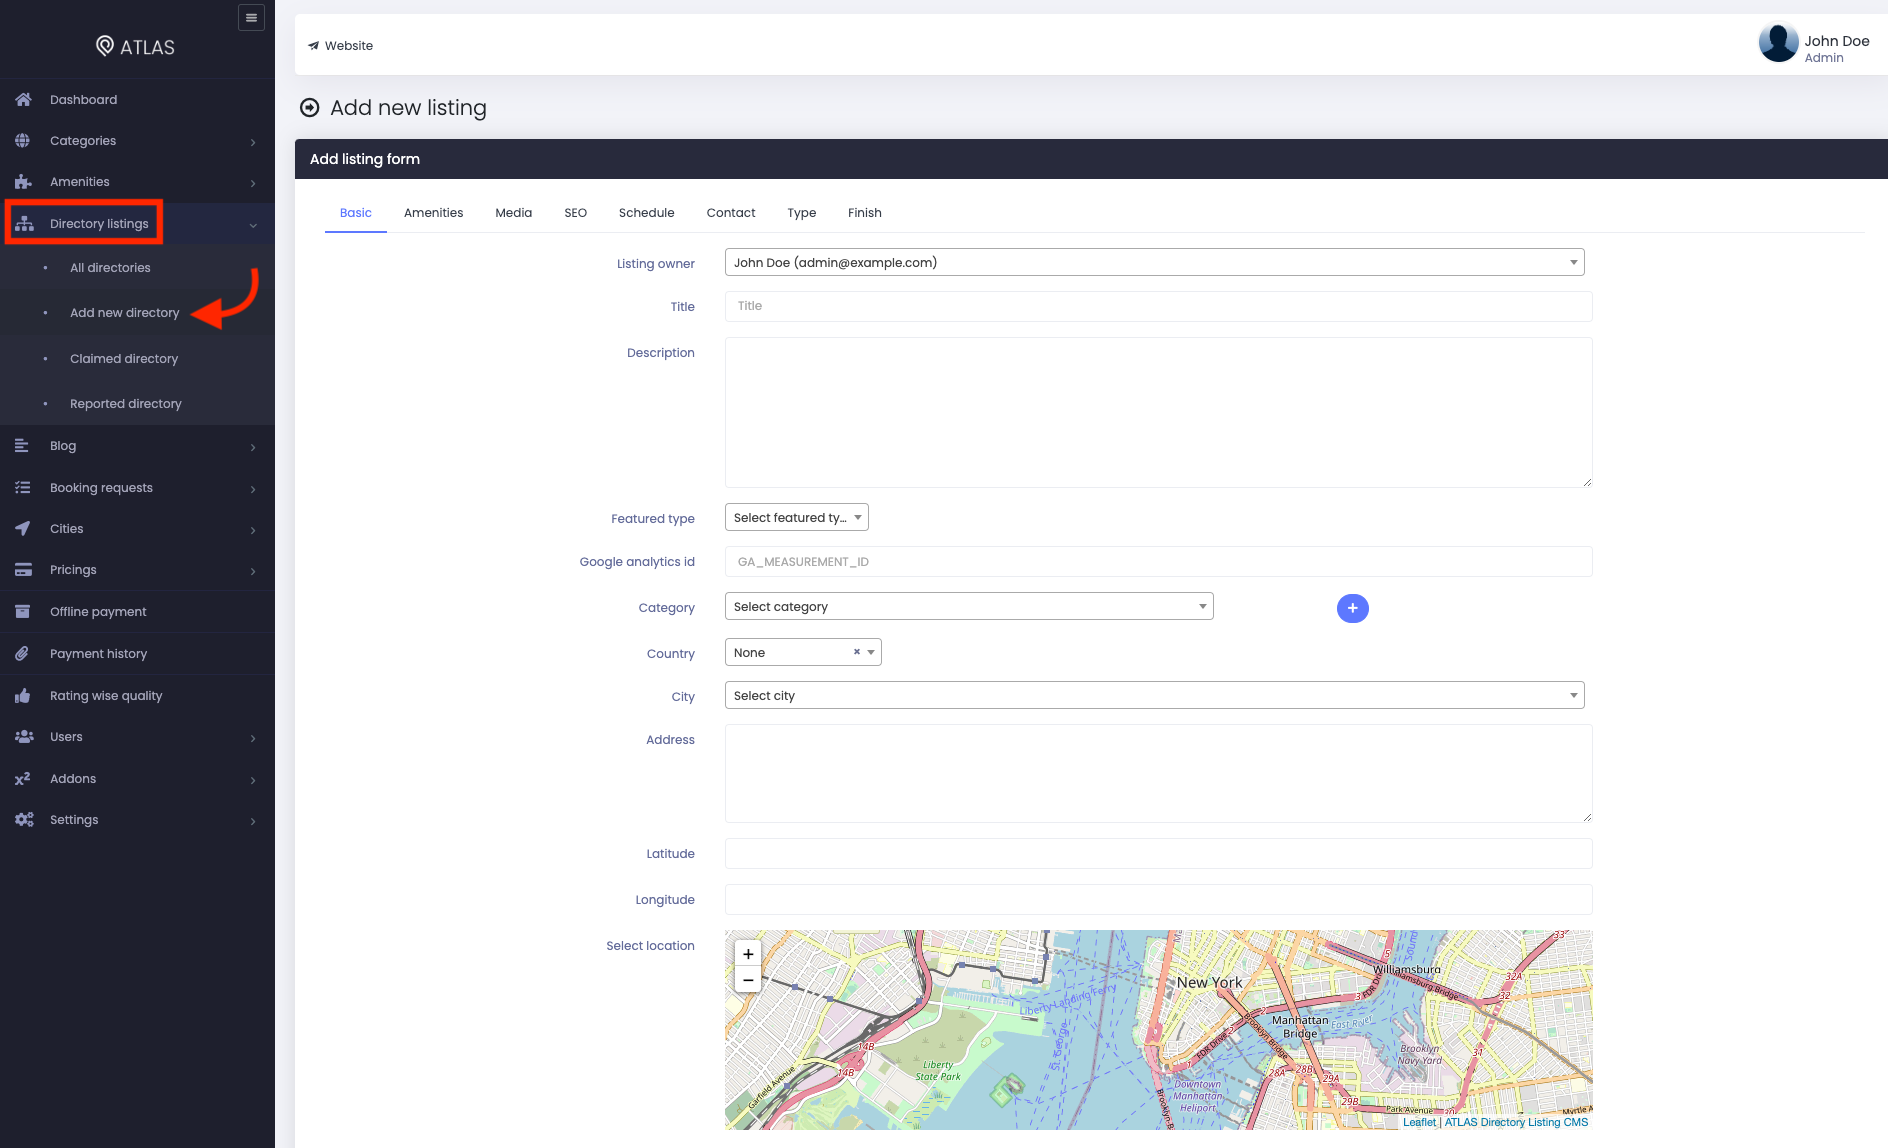
Figure 1. Atlas Adding New Directory
Now, you have to complete the "Add listing form" for your new directory.
Basic
In this form, you have to provide:
- Select a listing owner.
- Provide a title.
- Add a description of the listing.
- Set business types.
- Google analytics ID.
- Business category. (You can choose multiple categories for a directory. For this, you can click on the (+) icon. To remove a category, click on the (-) icon.
- Select country & city.
- Provide address.
- Choose the business location from the "Select location" to complete the Latitude and Longitude. (Latitude and Longitude information will be updated automatically after selecting the location from the map)
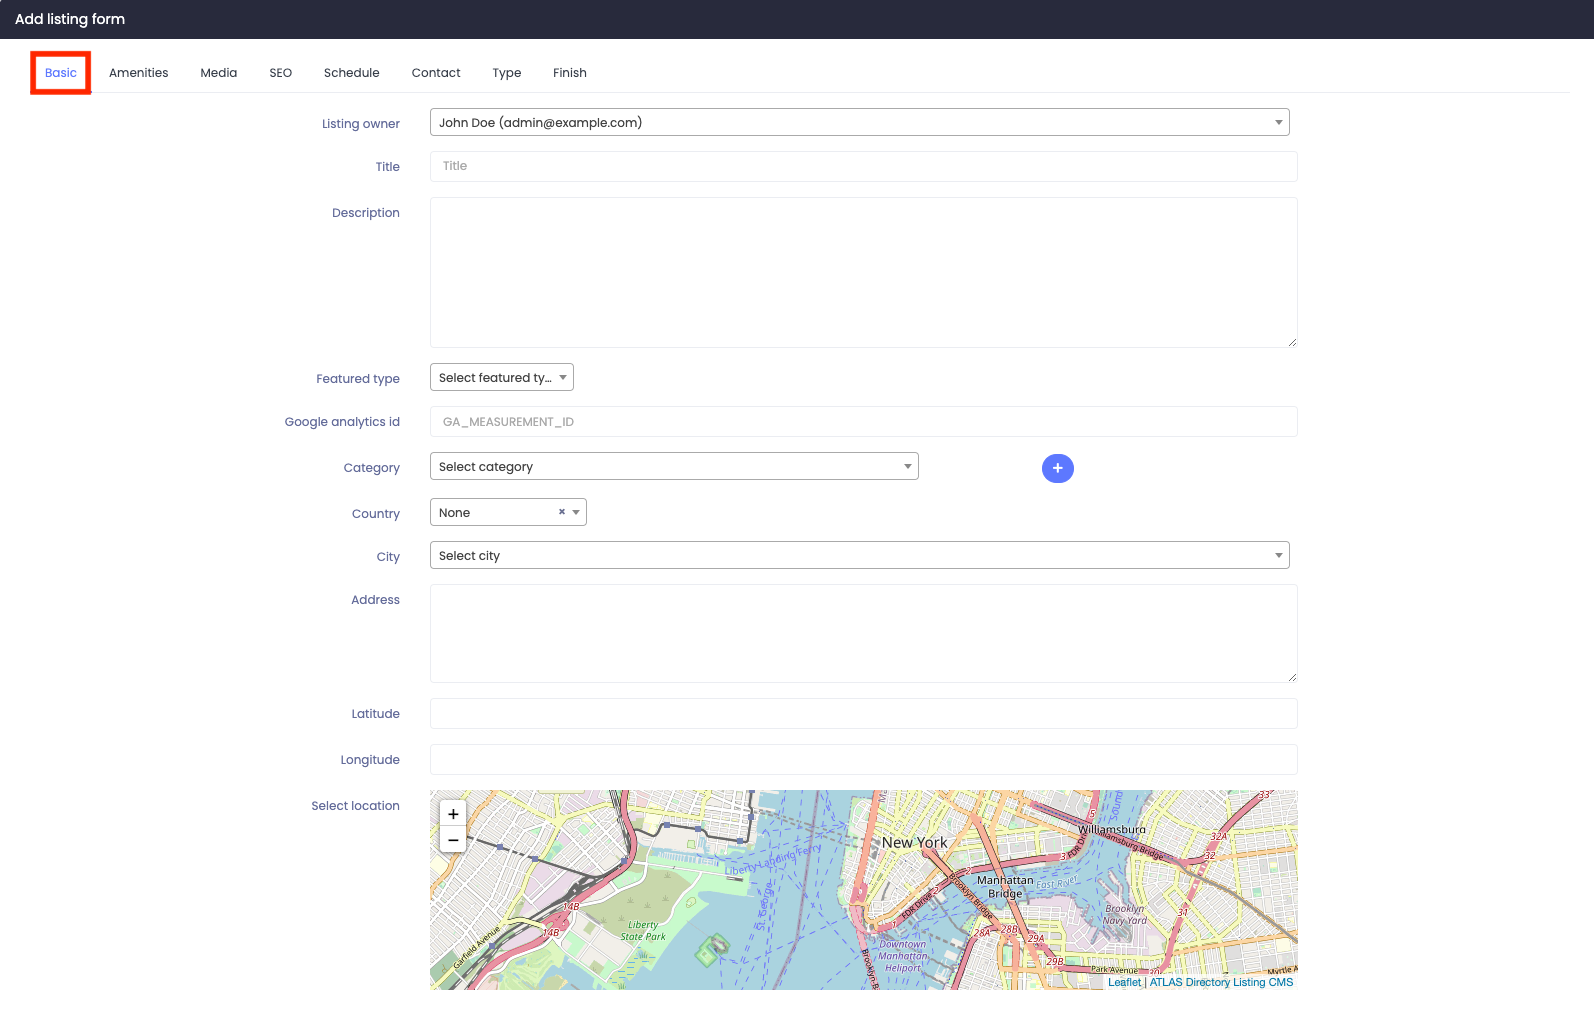
Figure 2. Atlas Basic Form
Amenities
Just click on the amenities to add them to the business.

Figure 3. Atlas Amenities Form
Media
To list the directory, you can add images and videos of the business. In this form, you can:
- Upload listing thumbnail.
- Upload listing cover.
- Choose the video platform.
- Provide Video URL.
- Upload listing gallery images. (Click on the "+" icon to add multiple images)
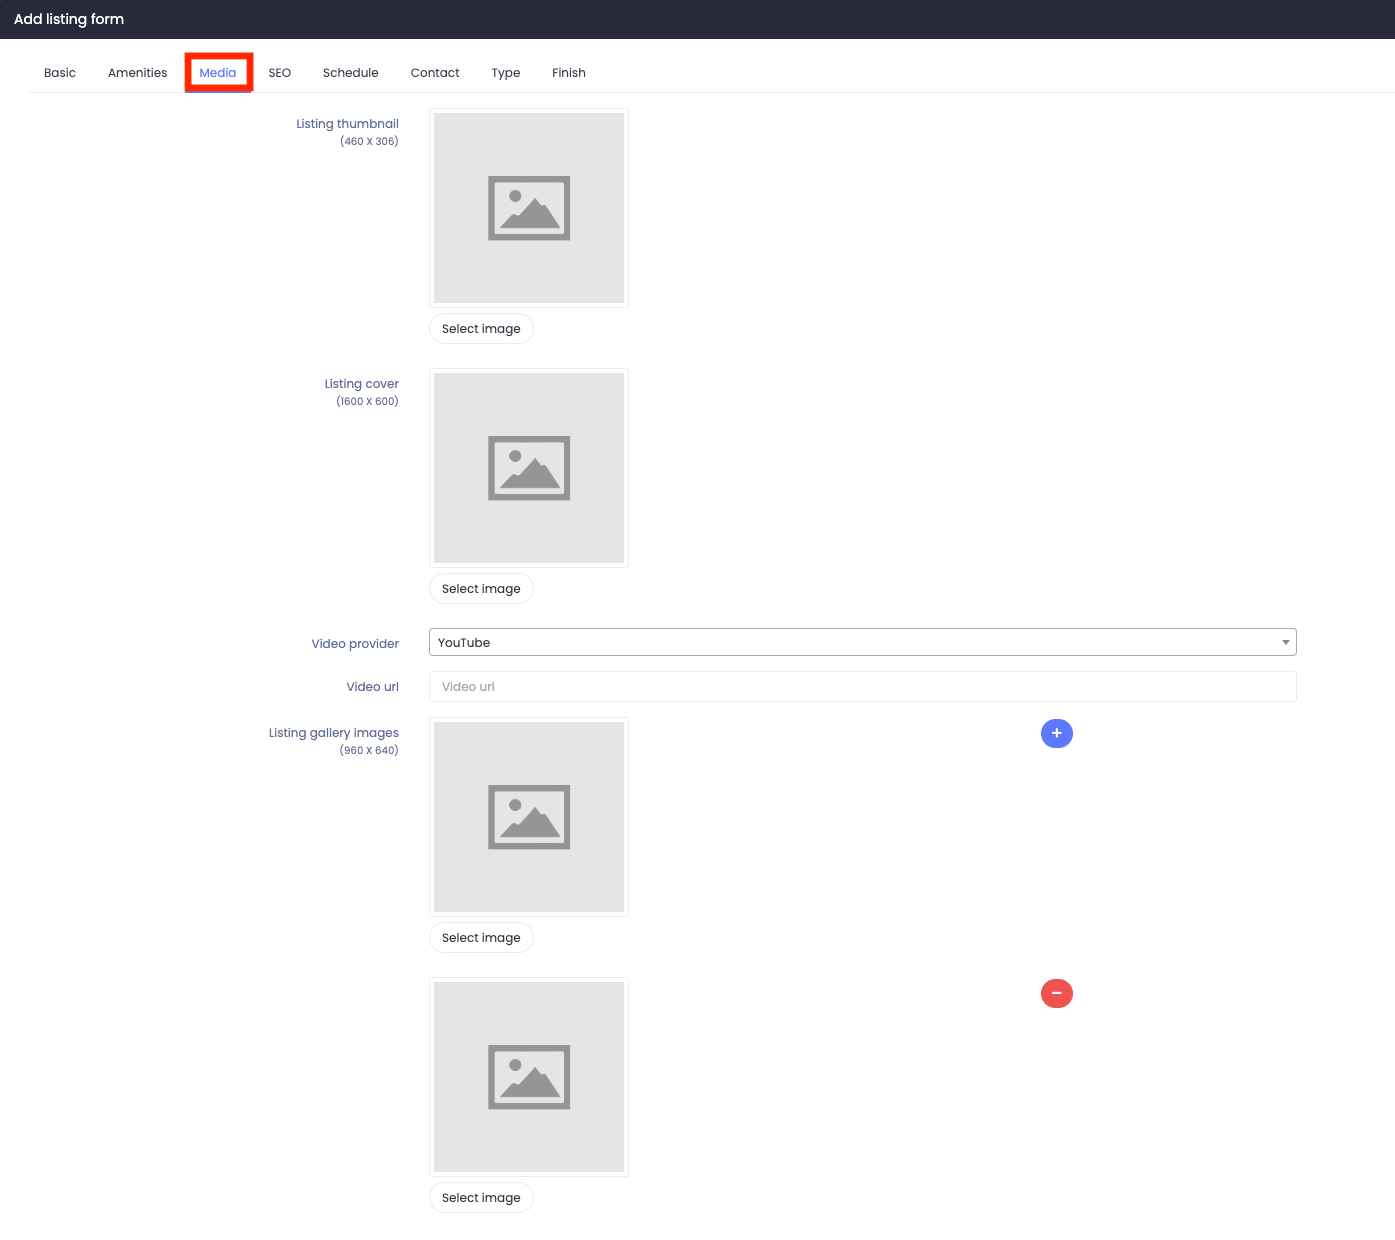
Figure 4. Atlas Media Form
Note: You can choose images from your device.
SEO
With this form, you can optimize your directories search engine. For this, you have to provide:
- Meta keywords
- Meta description

Figure 5. Atlas SEO Form
Schedule
You can provide the weekly schedule of a business in this form. Just set every day's opening and closing schedule.
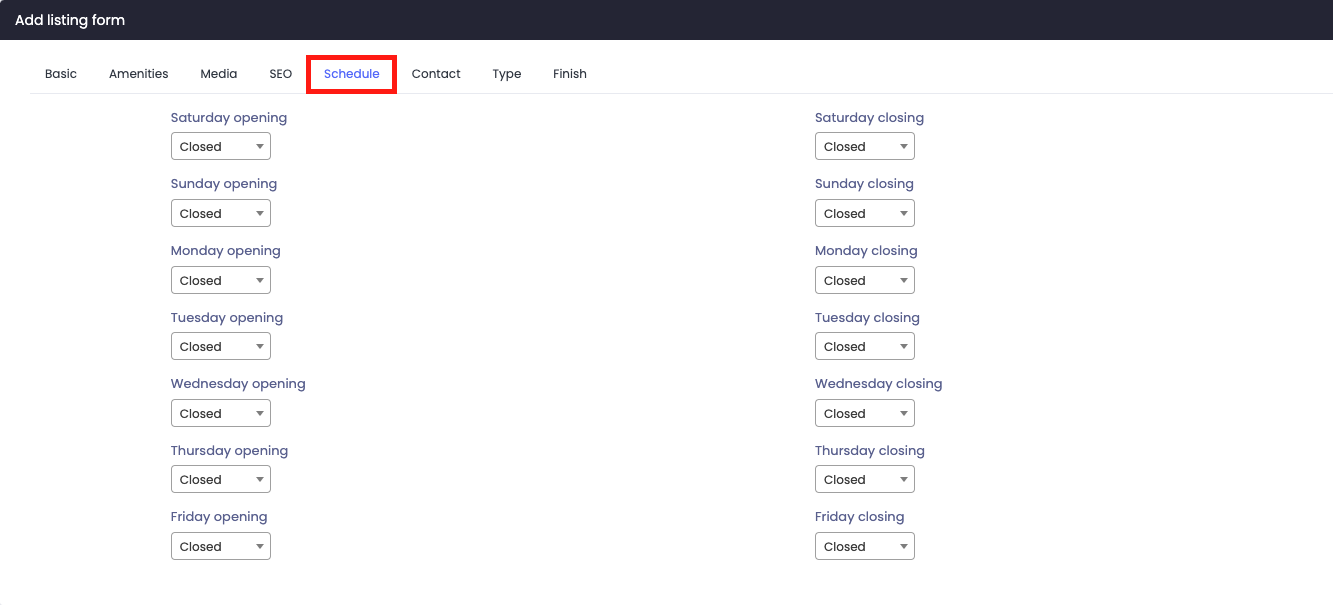
Figure 6. Atlas Schedule Form
Contact
You have to provide every contact and social media information about the business/directory in this form. Here, you can:
- Provide website.
- Add Email.
- Set phone number.
- Provide Facebook, Twitter, and Linkedin links.

Figure 7. Atlas Contact Form
Type
To list a directory/business, you have to select a type. In this form, you can choose your business type and provide the business information such as service, menu, products, price, and descriptions. You can also submit your service images. You can also add several new rooms, menus, products, or services. For this, you have to click on the "Add new room" button. Select the "Remove this room" button to remove rooms, menus, or services.

Figure 8. Atlas Type Form
Note: If your business didn't match any of these selected types or you are confused about the business type, choose the "General" type.
After providing all the information, you have to click on the "Submit" button from the "Finish" form.

Figure 9. Atlas Submitting New Form
Managing claimed directory
If your customers claim a directory for listing as a verified directory, you can review their information and mark that directory as verified. For this, you can follow the steps below:
- Select the "Directory" from the left menu.
- Click on the "Claimed directory" button from the sub-menu.
- Choose a directory from the list.
- Select the "Action" button.

Figure 10. Atlas Claimed directory
- Click on the "Approved" button.

Figure 11. Atlas Approving Claimed Directory
Editing directories
After adding new directories, you can update and change the information anytime you want. For this, you can navigate:
- Select the "Directory" from the left menu.
- Click on the "All directories" from the sub-menu.
- Choose a directory from the list.
- Click on the "Action" button.
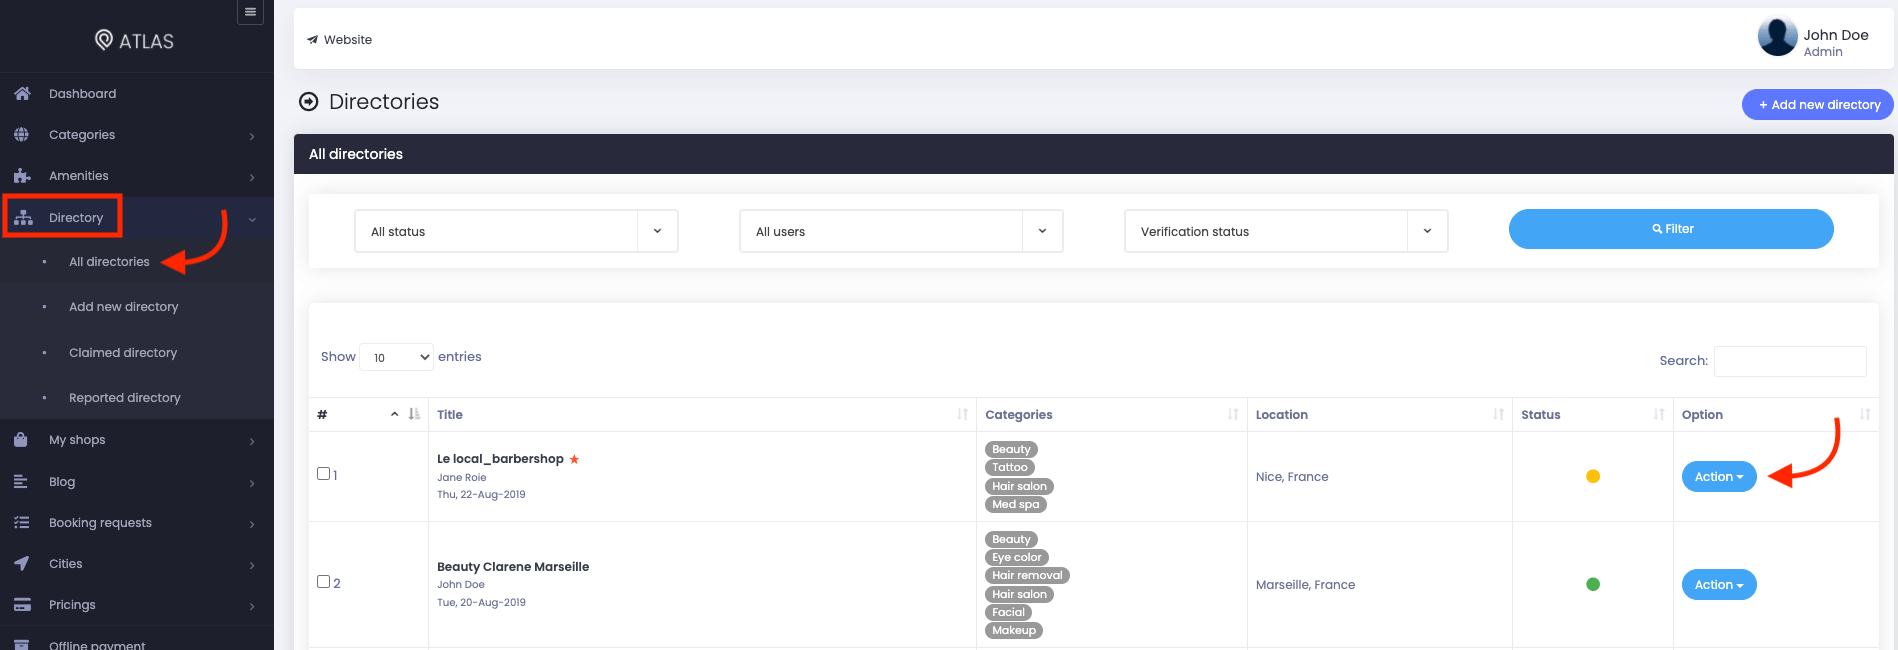
Figure 12. Atlas Managing Directories
- Click on the "Edit" button.
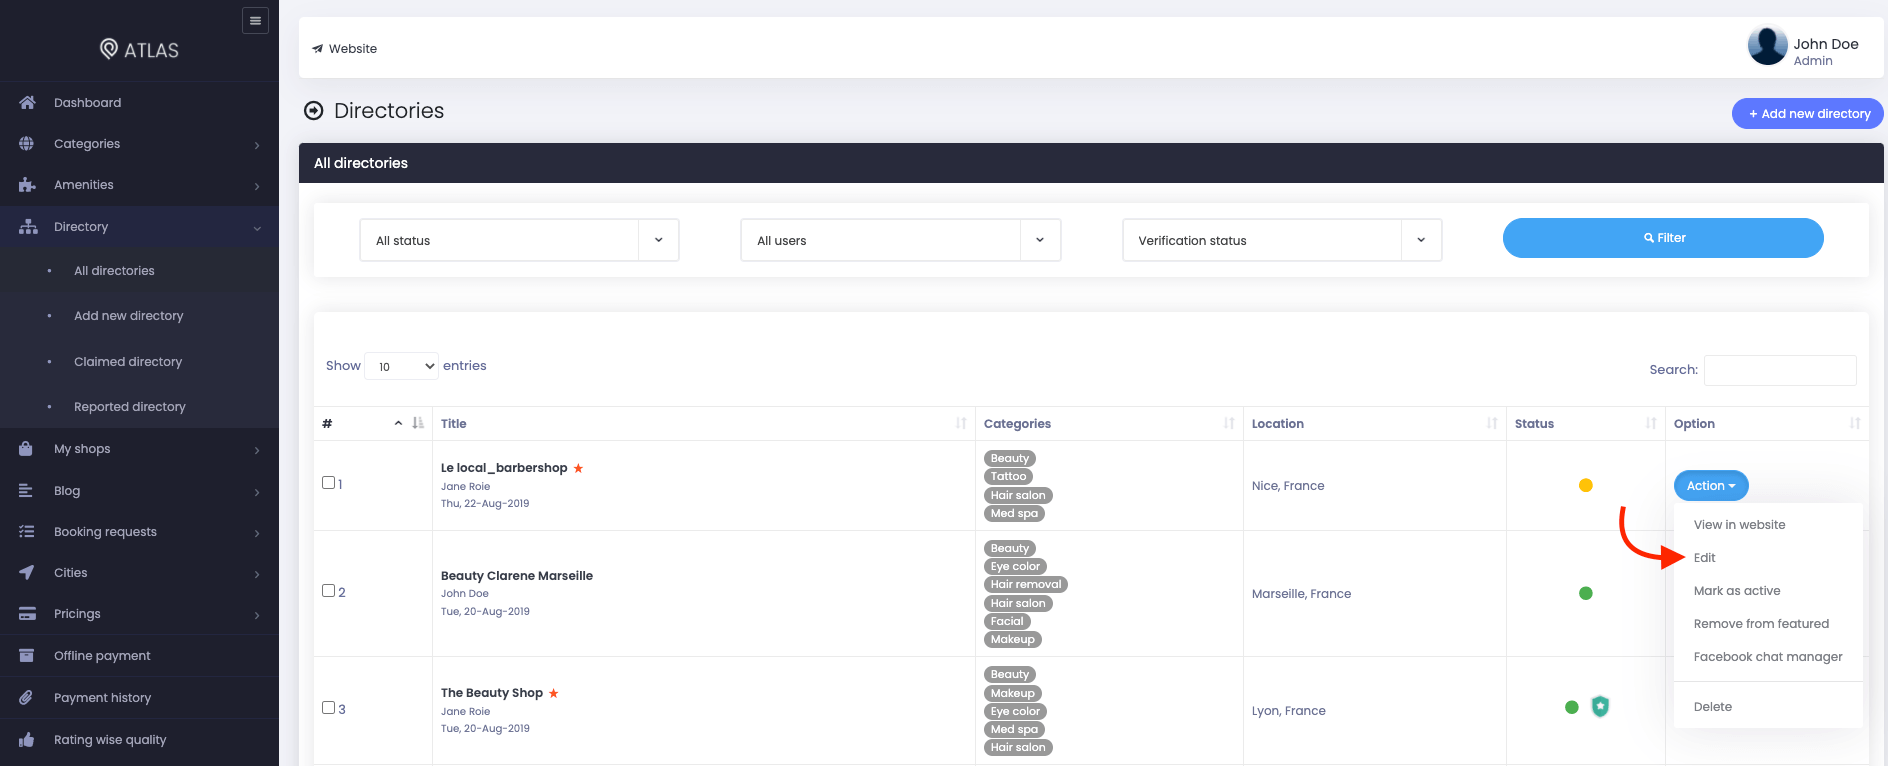
Figure 13. Atlas Editing A Directory
- Update required information.
- Click on the "Submit" button from the "Finish" form.

Figure 14. Atlas Saving The Directory
Status managing
You can change the activation status of any directories. You can make them active/inactive. tho manage the status, and you can follow the steps below:
- Select the "Directory" option from the left menu.
- Click on the "All directories" option from the sub-menu.
- Select a directory from the list.
- Click on the "Action" button.

Figure 15. Atlas Managing A Directory
- Select the "Mark as pending/active" button.
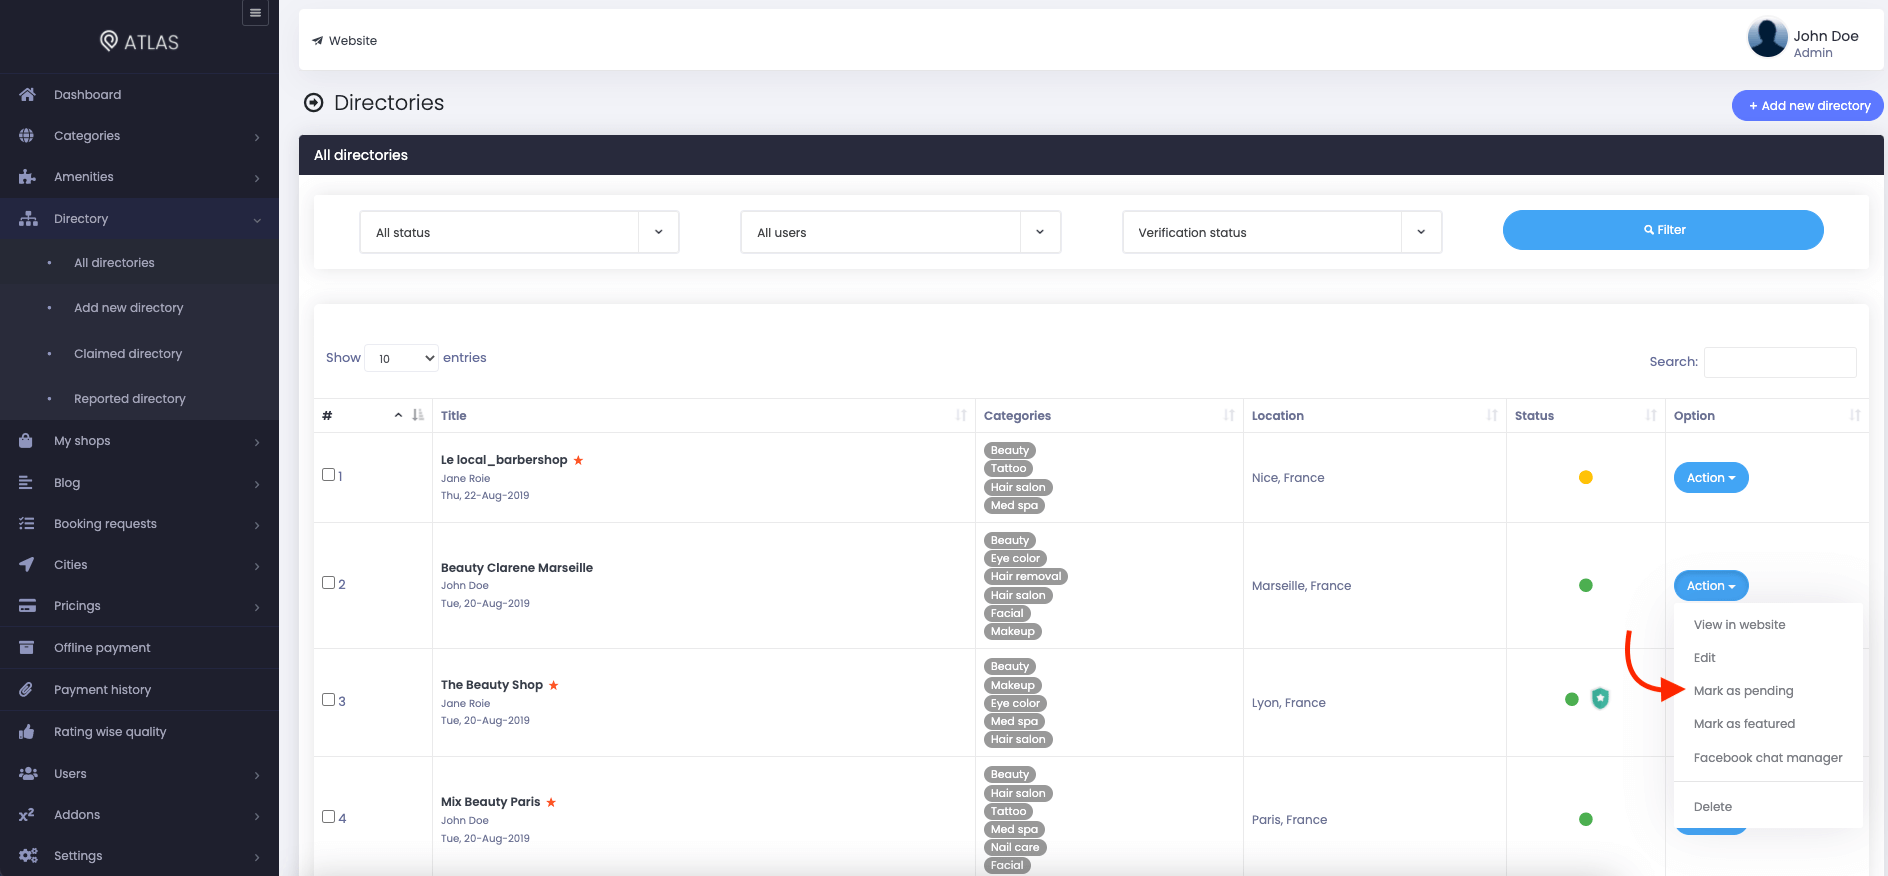
Figure 16. Atlas Pending A Directory
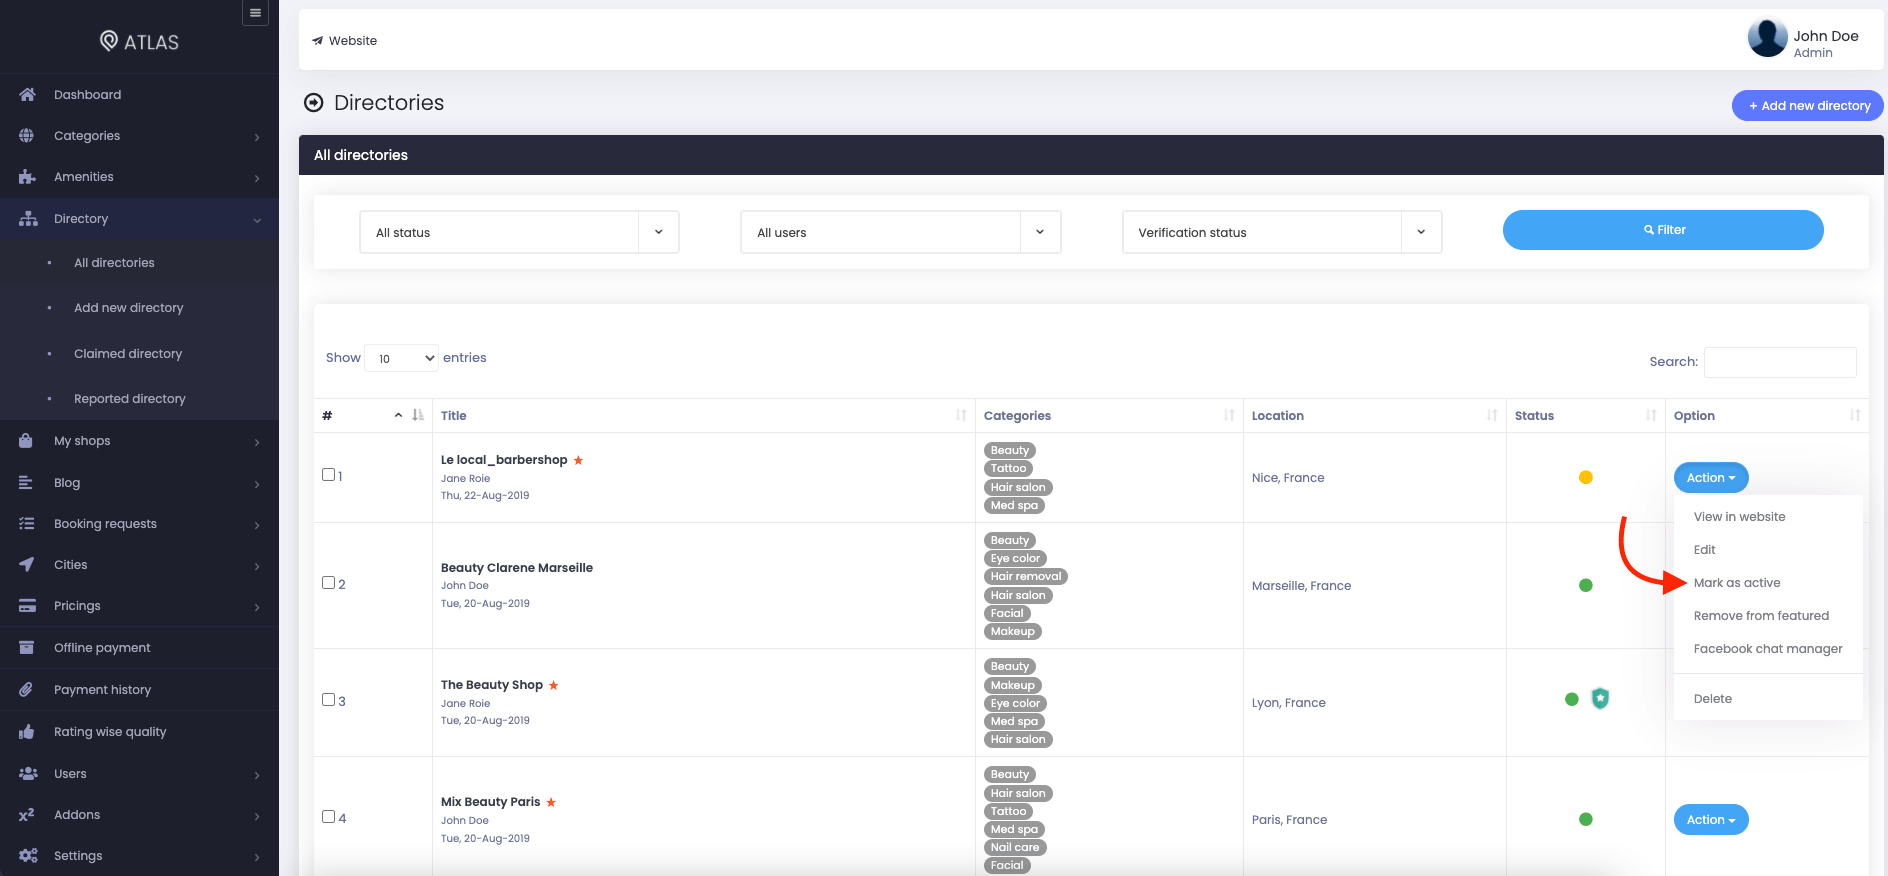
Figure 17. Atlas Activating A Directory
List featuring
You can feature any directory on the frontend of your website. If you feature any directory, it will be displayed top of the list. To feature a directory on the list, you can navigate:
- Select the "Directory" option from the left menu.
- Click on the "All directories" option from the sub-menu.
- Select a directory from the list.
- Click on the "Action" button.

Figure 18. Atlas Managing A Directory
- Select the "Mark as featured/Removed from the featured" button.
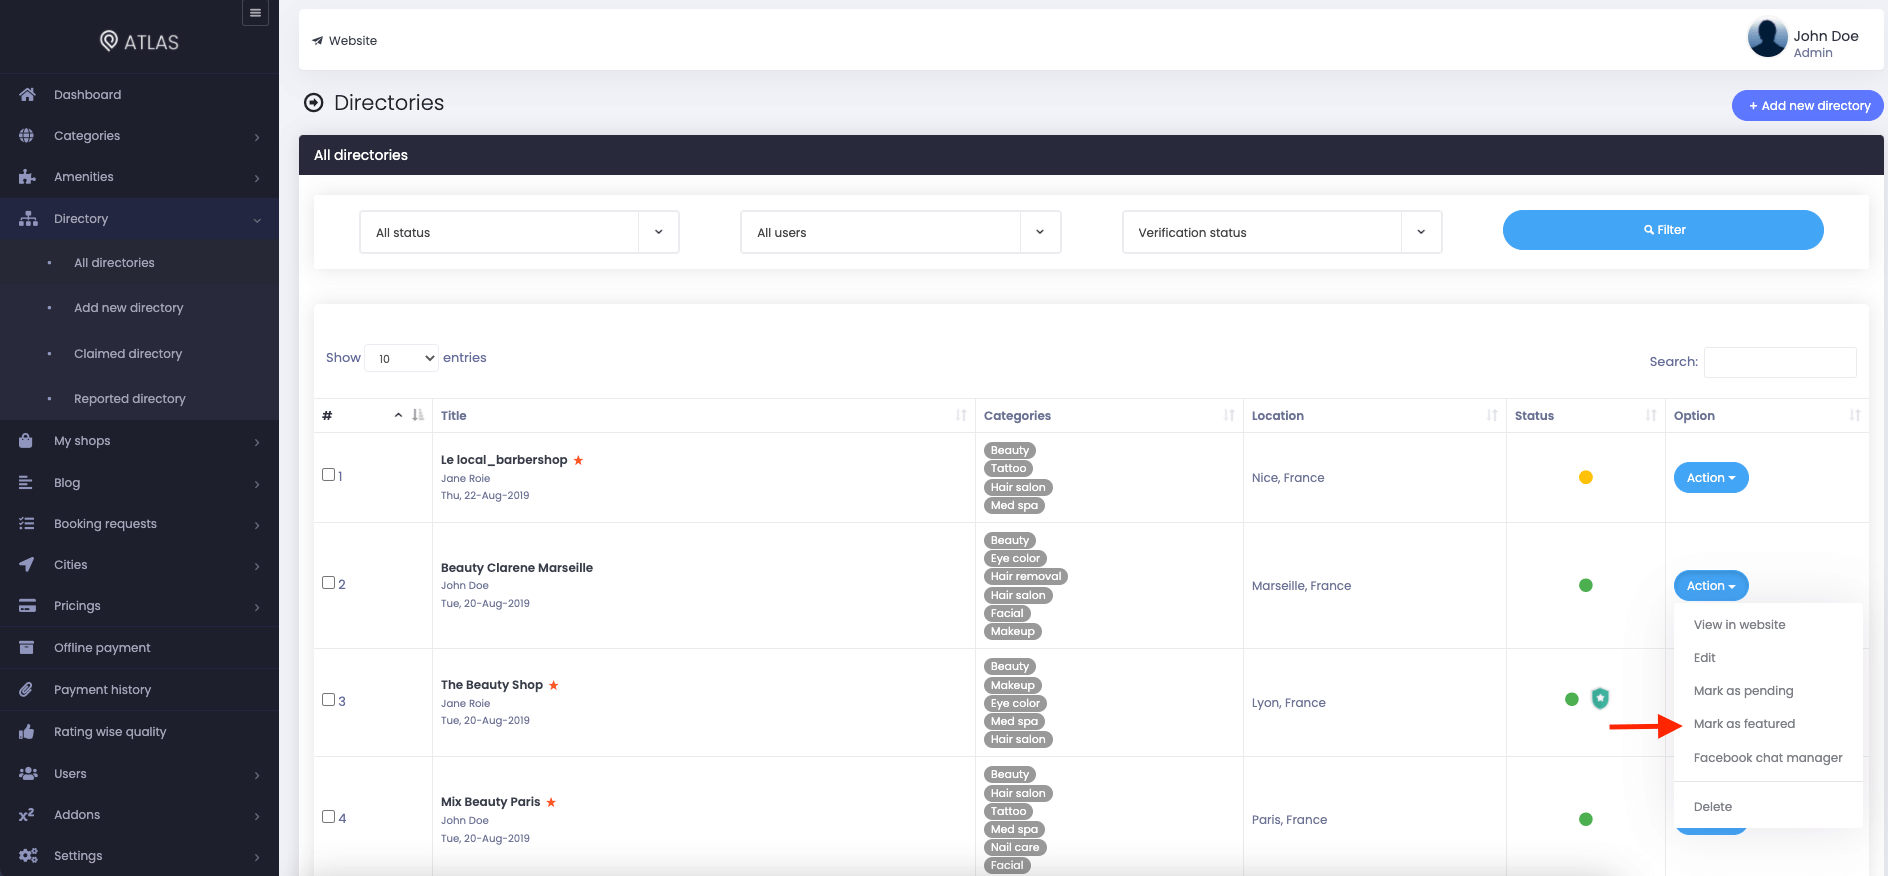
Figure 19. Atlas Featuring A Directory
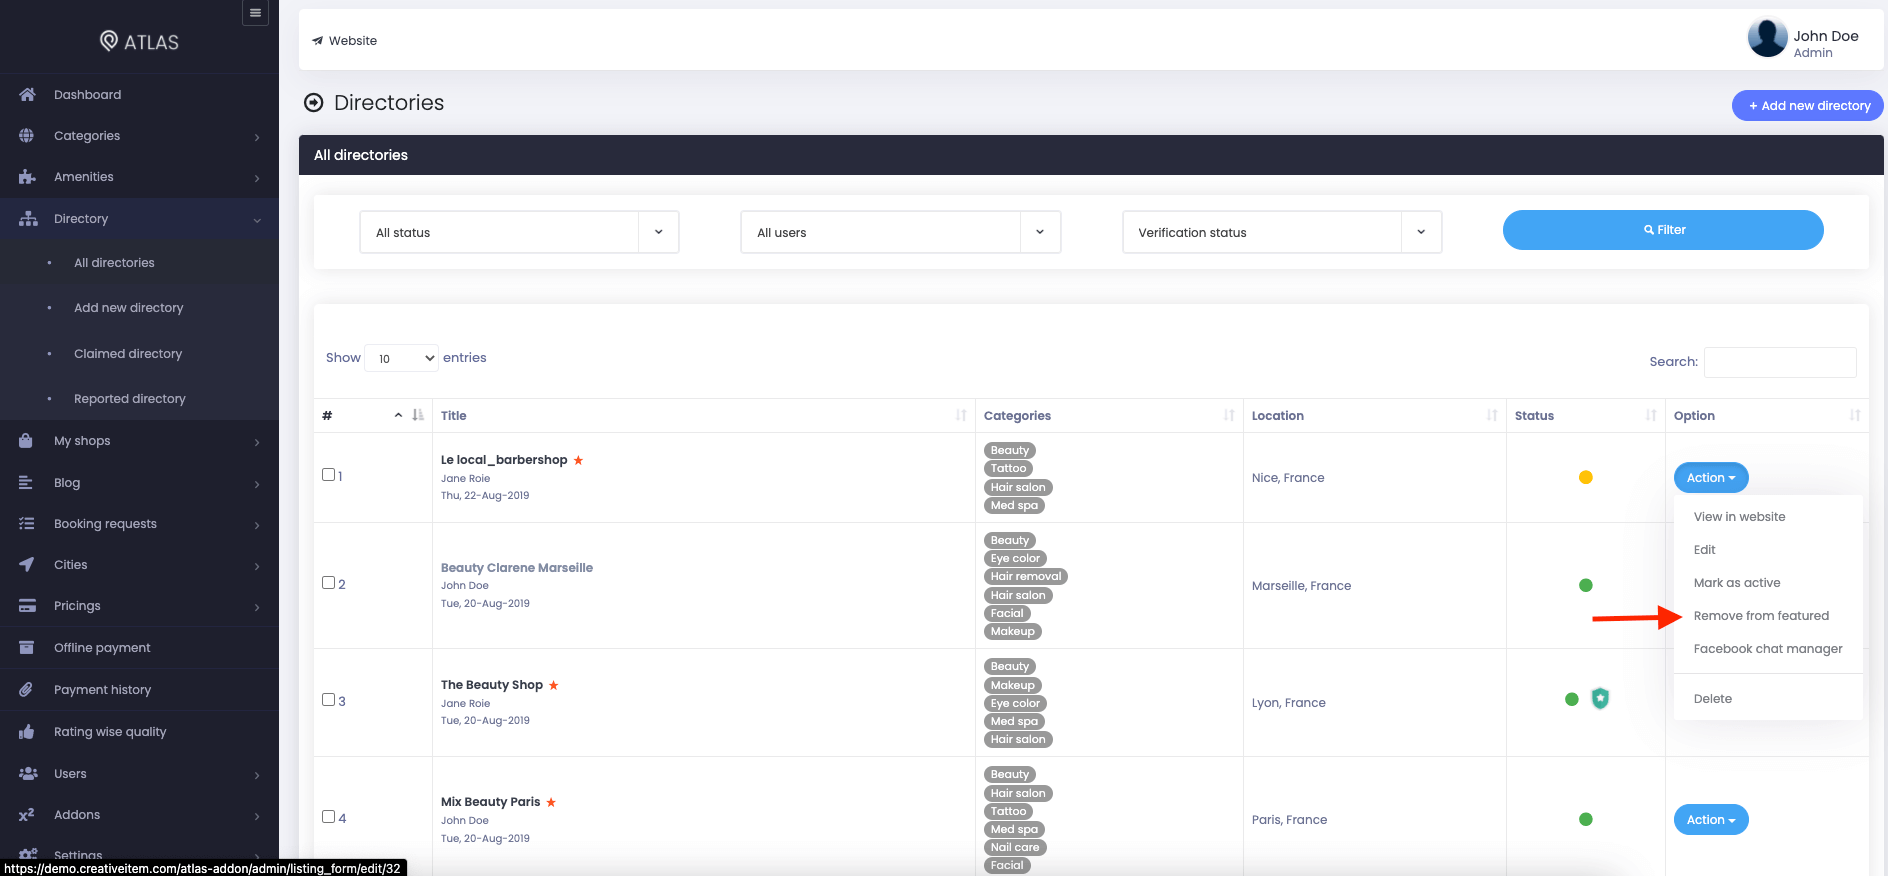
Figure 20. Atlas Removing A Directory From Featured Item
Deleting a directory
You can remove any directory from the list anytime you want. For this, you can follow the steps:
- Select the "Directory" option from the left menu.
- Click on the "All directories" option from the sub-menu.
- Select a directory from the list.
- Click on the "Action" button.

Figure 21. Atlas Managing A Directory
- Select the "Delete" button.
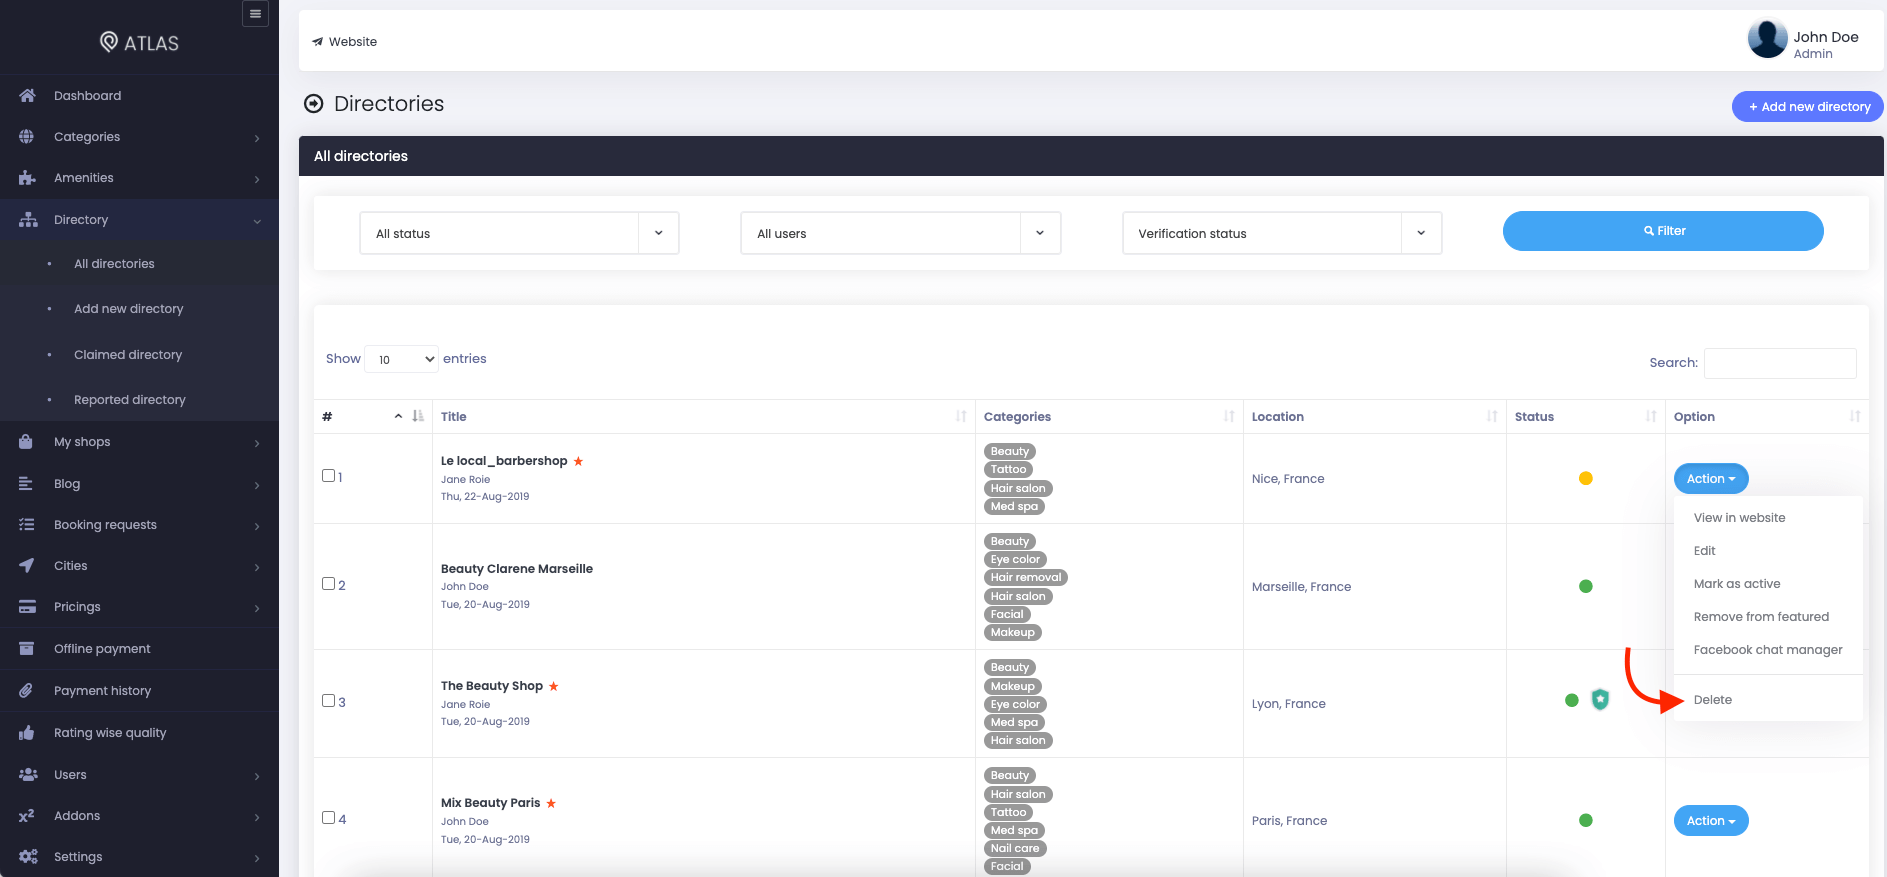
Figure 22. Atlas Deleting A Directory
- Again click on the "Delete" button for confirmation
Note: You can complete your activity at a time by marking multiple directories.
Contact us and we'll get back to you as soon as possible
