Managing users
In the Atlas, customers can register themselves. You can also manually register a customer on your website. Besides that, you can update or remove your customer's account and information.
Adding a new customer
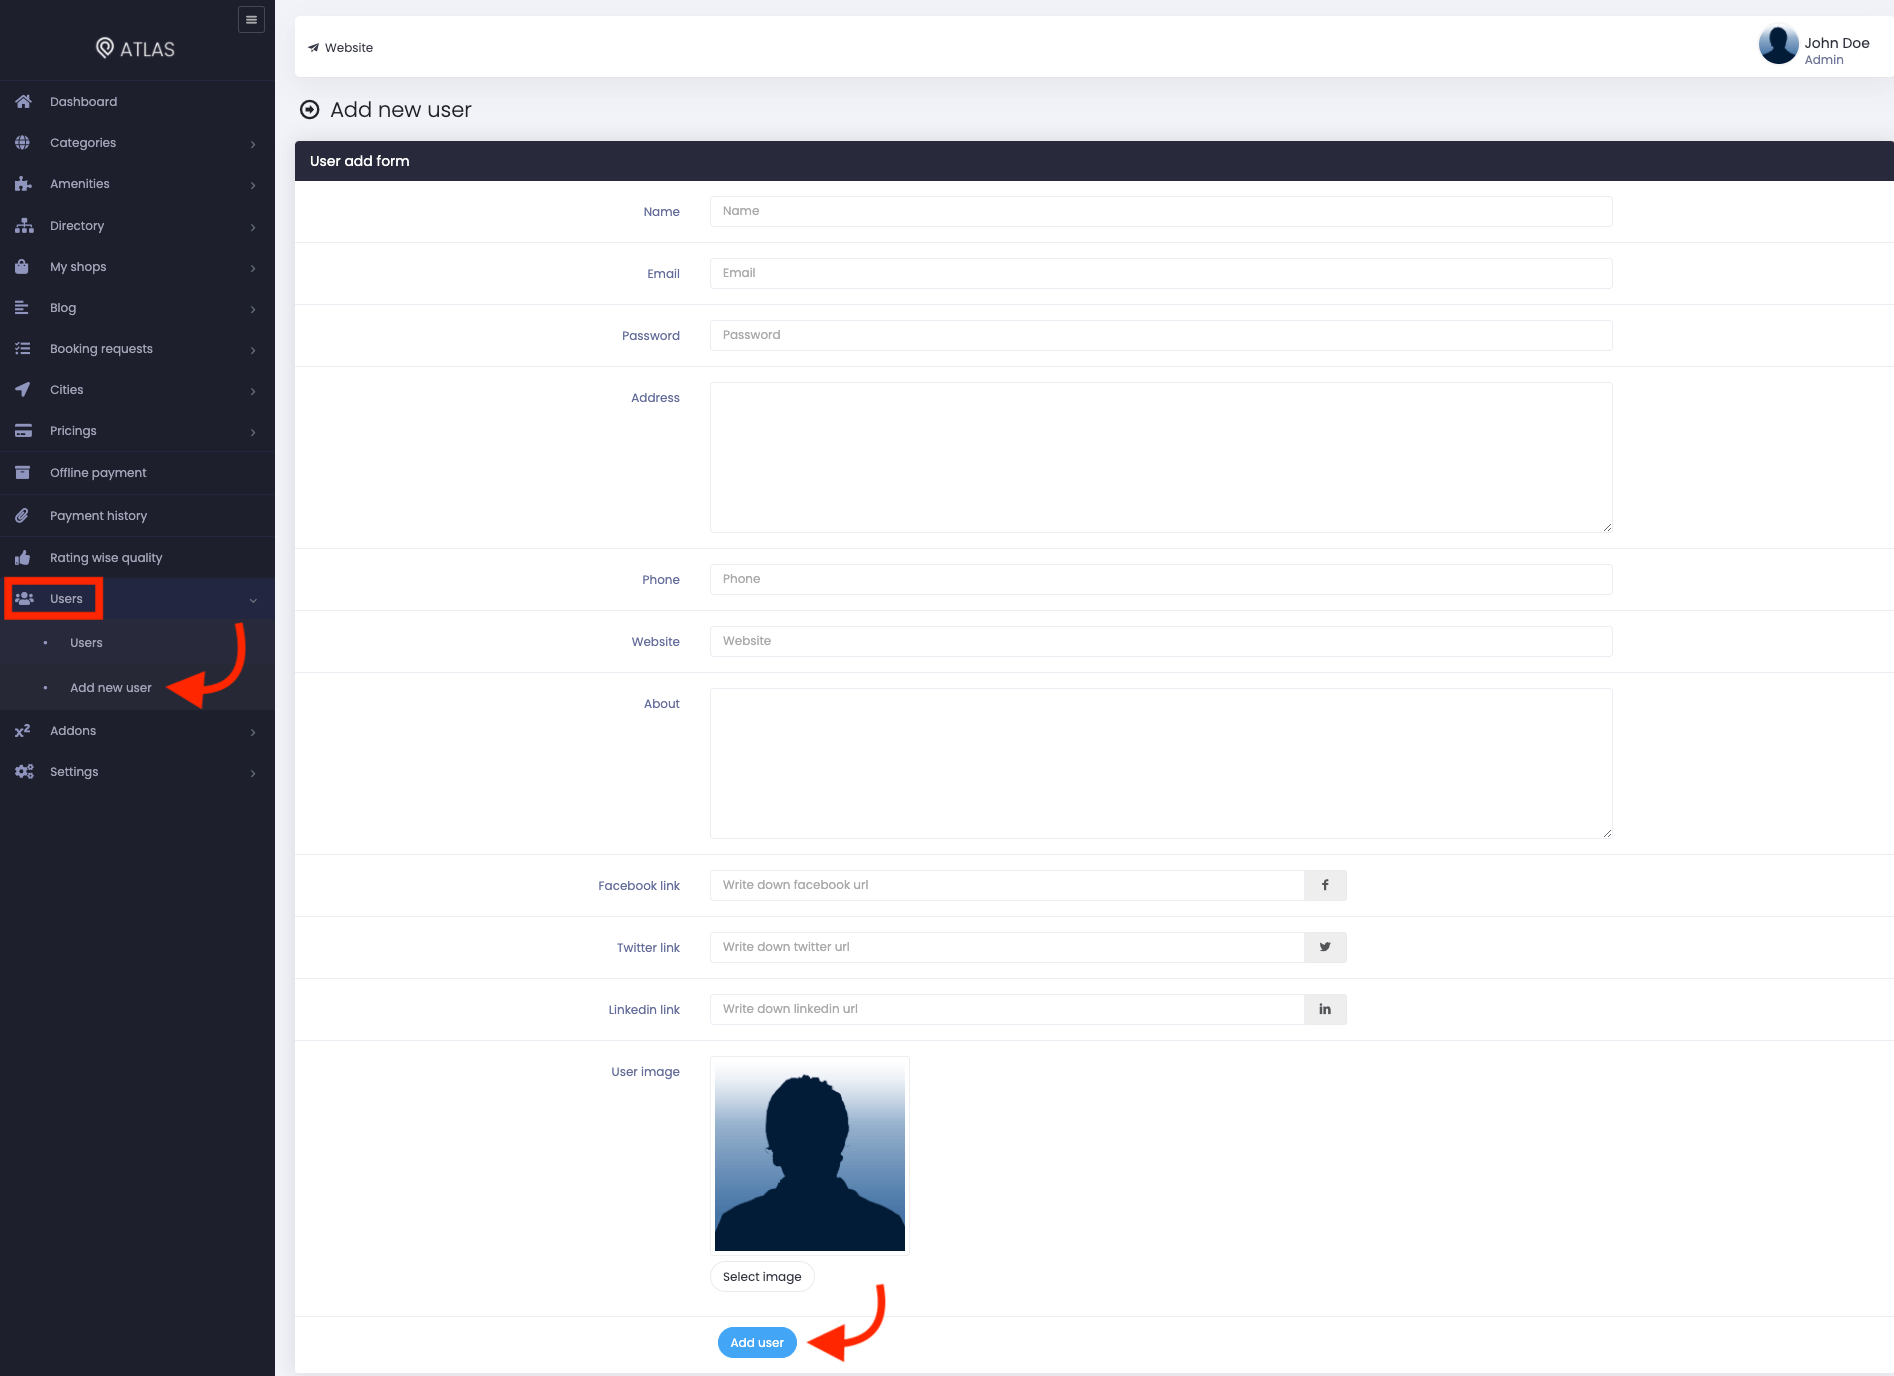
To add a new customer to your website, you can follow the steps below:
- Login to the website as an admin.
- Select the "Users" button from the left menu.
- Click on the "Add new user" button from the sub-menu.
- Provide your customer's name.
- Add their Email address.
- Provide password.
- Add their address. (Customer's address)
- Provide phone number. (Customer's phone number)
- Provide website link. (Customer's business website link)
- Add a description of your customer.
- Provide your customer's social media link. (Facebook, Twitter, and Linkedin)
- Upload your customer's image. (You can upload the image from your device)
- Click on the "Add user" button to save your data.

Figure 1. Atlas Adding A New User
Updating a customer
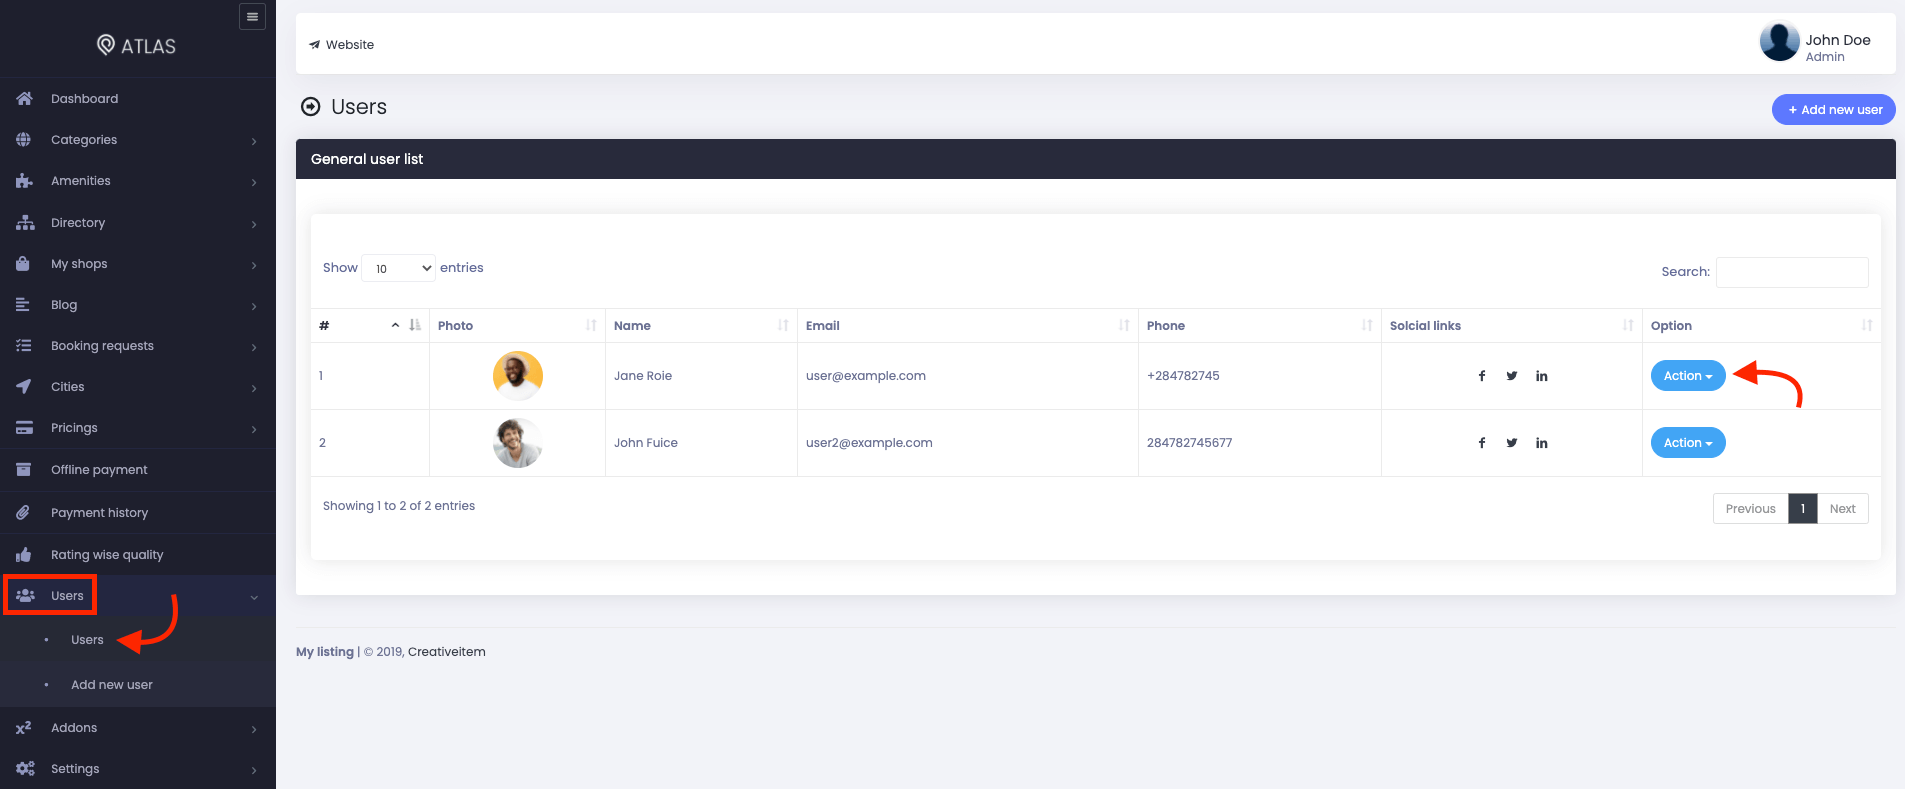
You can update your customer's information within a few clicks. For this, you can navigate:
- Select the "Users" button from the left menu.
- Again click on the "users" button from the sub-menu.
- Select a user from the list.
- Click on the "Action" button.

Figure 2. Atlas Managing Users
- Click on the "Edit" button to update the data.

Figure 3. Atlas Editing Users
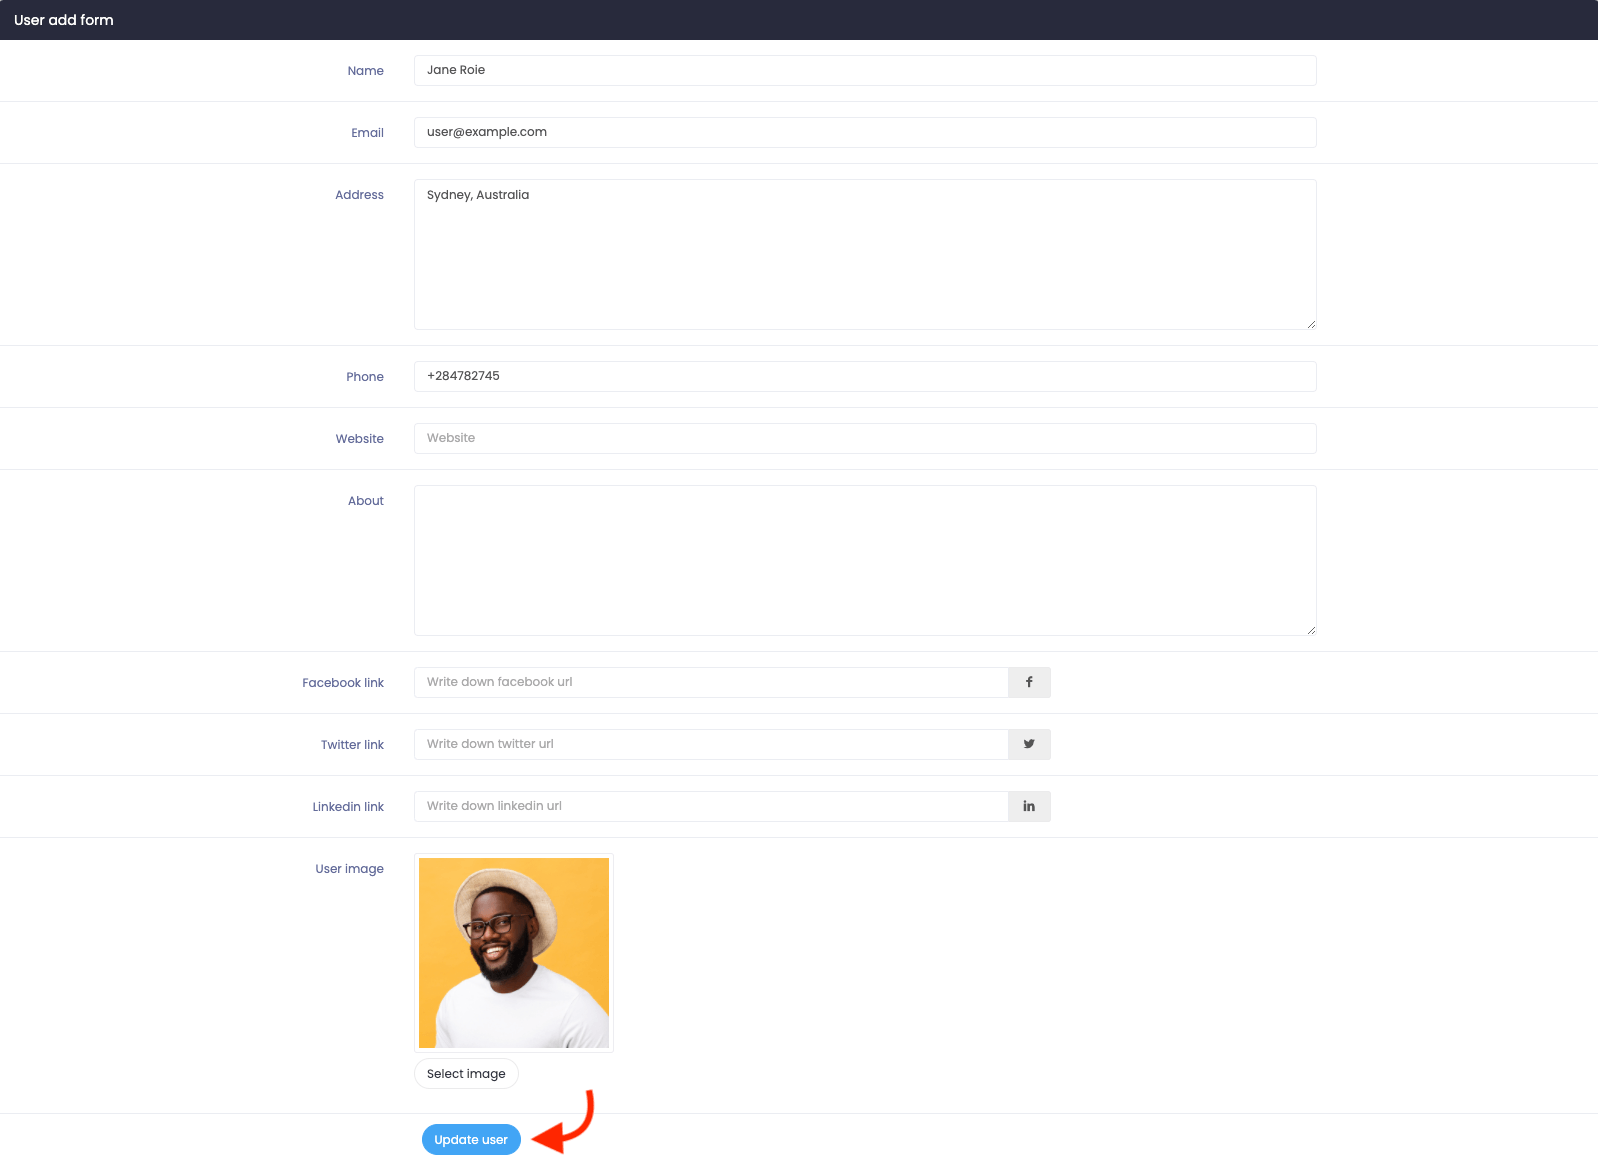
- Update required information.
- Click on the "Update user" button to save your updated data.

Figure 4. Atlas Saving Updated User
Removing a customer
You can remove a customer from your website. To remove a customer, you can navigate:
- Select the "Users" button from the left menu.
- Again click on the "users" button from the sub-menu.
- Select a user from the list.
- Click on the "Action" button.

Figure 5. Atlas Managing A User
- Click on the "Delete" button.

Figure 6. Atlas Deleting A User
- Again click on the "Delete" button for confirmation.
How can we help?
Contact us and we'll get back to you as soon as possible
