
Documentation
Alumni Addon
Get the feature of managing your graduated student database, events, and gallery in your schools with the Ekattor 8 Alumni addon. This alumni addon is designed to manage your school alumni info, manage their events, and photos with a user-friendly interface for your Ekattor 8 application. Also, your graduated students can keep in touch with their friends through this Ekattor 8 Alumni addon.
How it Works:
- Ekattor 8 should be pre-installed on your server
- Purchase Alumni Addon for Ekattor 8 application from Codecanyon
- Download and install the addon to your Ekattor 8 portal
- Follow the given documentation regarding the Alumni addon configuration setup
- Navigate to Alumni > Manage Alumni
- Create and manage alumni events from Alumni > Events
- Create and manage alumni gallery from Alumni > Gallery
- Alumni can manage their profiles after receiving login details from the admin
CHECKING THE LATEST VERSION:
Before Installing this process we would recommend you to check your application version. For this, you have to navigate to the "About" section from the "Settings" button.

- If you're running the latest version, then you are ready to install this addon.
ALUMNI ADDON INSTALLATION PROCESS:
The Steps listed below can be followed for Installing the Alumni Addon:
- Download the addon you want to install on your application.
- Go back to the application and log in as Superadmin.
- Select the "Addons" option from the left menu.
- Click on the "Add new addon" button from the right side.

- Choose the addon file & click on the "Install Addon" button.

- Your Addon will be installed.
HOW TO DEACTIVATE THE ALUMNI ADDON:
As a Superadmin you can deactivate this addon anytime. For deactivating this addon you can follow the steps:
- Click on the "Action" button from the right side.
- Then click on the "Deactivate" button.

- Click on the "Yes" button for confirmation.

- Your Addon will be Deactivated.

- You can reactivate Addon by clicking on the "Active" button from the action bar.

HOW TO DELETE THE ALUMNI ADDON:
As a Superadmin you can delete this addon if you want to. The steps below could be useful for deleting this Alumni addon:
- Click on the "Delete" button from the action bar.

- Tap on the "Yes" button for confirmation.

- Your addon will be deleted.
HOW TO SET ALUMNI ADDON IN THE ADMIN PANEL:
You can follow the instruction below to set up the Alumni Addon:
- Log in as admin.
- Tap on the "Alumni" option from the left menu.
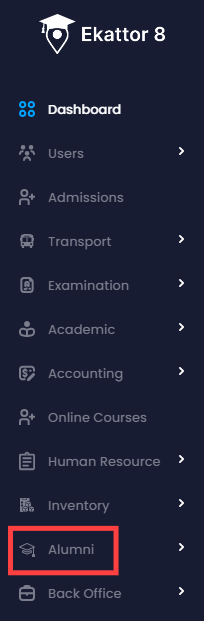
- Here you will find three options (Manage Alumni, Events, & Gallery).
HOW TO ADD AN ALUMNI:
Admin has the authority to add an alumni, the below steps might be helpful for adding a new alumni:
- Click on the "Manage Alumni" option from the left side.
- Then click on the "Add Alumni" button from the right side.

You will get a Create Alumni form. Here you need to provide;
- Your Alumni's full name.
- Email Address
- Password
- Designation
- Birth date
- Gender
- Phone Number
- Blood Group
- Alumni's Address
- Profile Picture

- After filling this section tap on the "Create" button for creating an alumni.
HOW TO EDIT AN ALUMNI'S INFORMATION:
Admin has the authority to edit an alumni's information. For this, you can follow the below steps:
- Click on the "Edit" button from the action bar.

- Here you can update all the information you have provided for creating an alumni.

- Then click on the "Update" button.
Your information will be updated.
HOW TO FILTER & EXPORT THE ALUMNI'S LIST:
If you want to find a specific Alumni you can find them by filtering their Name on the search option. For this, you can follow the steps below:
- Write the name of the alumni you want to find.
- Click on the search option.

- You will get the information there.
You can make a PDF file or Print the list of them by clicking on the button called "Export" from the right side.

HOW TO DELETE AN ALUMNI'S INFORMATION:
Admin can delete an alumni's information anytime. For deleting an alumni's information you can follow the steps:
- Click on the "Delete" button from the Action bar.

- Then tap on the "Yes" option for confirmation.

- The Alumni will be deleted.
HOW TO ADD AN EVENT:
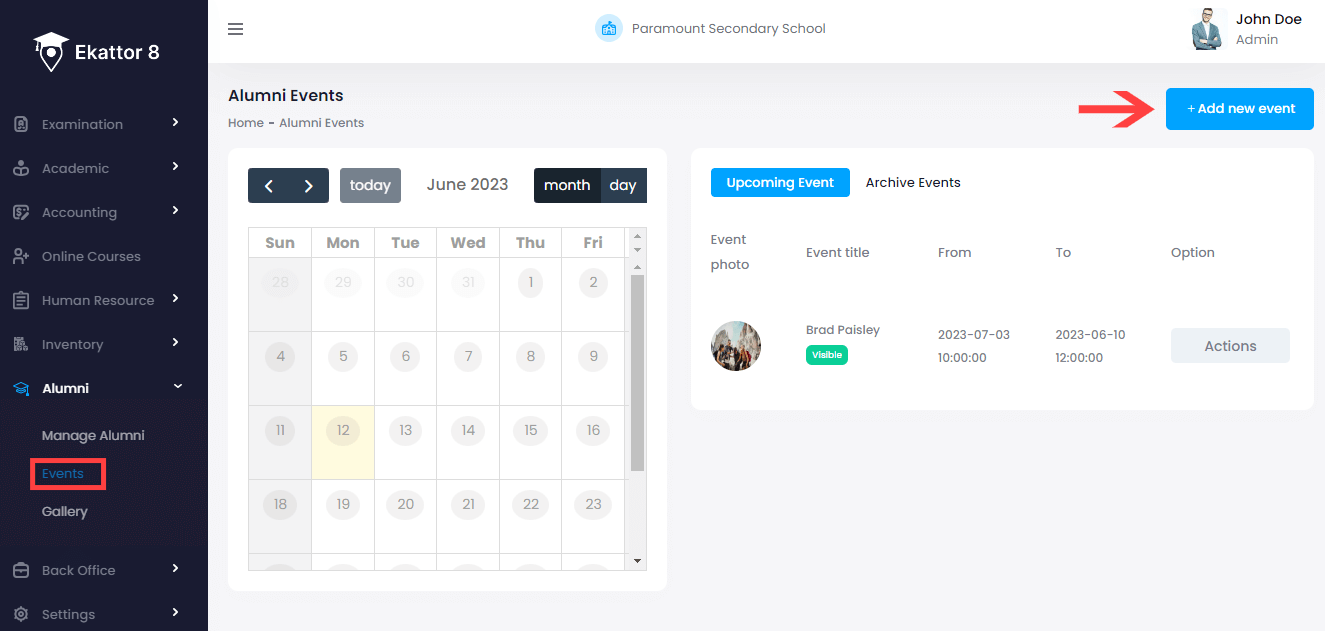
Admin can create an event anytime from the Alumni event option. For this, you can follow the steps below:
- Click on the "Event" option from the left side.
- Then click on the "Add new event" from the right side.
You will get an event-creating form. Here you need to provide:
- Event Title
- Event starting date
- Event ending date
- Event visibility
- And a photo of your event

- After filling this section click on the "Create" button for creating an event.
HOW TO UPDATE AN EVENT INFORMATION:
Admin can edit and update event information. The below steps might be helpful for this:
- Click on the "Edit" button from the action bar.

- Here you can update all the information you have provided for creating an event.

- After editing all the information click on the "Update Event" button for updating the information.
After choosing the event visibility "Don't Show" the event will be shown only in the Admin panel & others won't be able to view that.

Admin can also view the previous event from the "Archive Event" section.

HOW TO DELETE AN EVENT:
Deleting an event is so simple in the alumni section. The below steps might be helpful for that:
- Click on the "Delete" button from the Action bar.

- Then tap on the "Yes" button for confirmation.

- Your event will be deleted.
HOW TO ADD A NEW GALLERY:
Admin can add Gallery through this Alumni addon. The below steps might be helpful to know how this works:
- Click on the "Gallery" option from the left side.
- Then click on the "Add new Gallery" button from the right side.

You will get a gallery-creating form. Here you need to provide:
- Gallery title
- Description of the gallery
- And visibility

- After filling in all the required sections click on the "Save Gallery" button for creating a new gallery.
HOW TO EDIT GALLERY:
Admin can edit and update the gallery section. The below steps could be helpful for that:
- Click on the "..." button from the right side of the gallery.
- Then click on the "Edit" button.

- Here you can update the information that you have provided for creating a new gallery.

- You can also choose the visibility "No need to show" if you don't want anyone to view your gallery.
- After editing the information click on the "Update Gallery" button for updating the information.
You can add multiple images in this gallery section. For this, you can follow the steps below:
- Click on the "..." button in your gallery
- Then click on the "Add Photo" button.

You will get a photo-adding section.

- Choose your image and click on the "Save Image" button for adding an image.
HOW TO DELETE GALLERY:
Deleting a gallery is so easy in the Alumni addon. You can follow the below steps to know how it works:
- Click on the "Delete" option from the "..." button of the gallery.

- Then tap on the "Yes" button for confirmation.

ALUMNI PANEL:
The administrator has access to create alumni. Alumni can edit and update their information after receiving login details from the admin. The following actions could be useful for that:
- Log in to the account.
- Here you will get (Dashboard, Gallery, Event, Change Password, & Profile) sections.
Dashboard: Here in Dashboard, alumni will get a welcome message & be able to view the information about their school, their upcoming event, and the total number of students, teachers, staff, and parents.

Gallery: In this gallery section alumni will be able to view the Gallery information, and photos created by the admin.

Event: In this section, alumni can view upcoming and archive events created by the admin.


Change Password: Alumni have the authority to change and update their password. They can change their password from this section. To update their password here they need to provide;
- New Password
- Confirmation of their New Password &
- Current Password
After filling in the information click on the "Change Password" button for updating their password.

Profile: Alums can edit and update their information after having the login credentials from the Admin. Here they can update all the information provided by the admin. After changing the information they need to click on the "Save Changes" button for updating their information.

How can we help?
Contact us and we'll get back to you as soon as possible