Documentation
-
Introduction
-
Basics
-
Getting Started
-
Managing users
-
Academic activities
-
Exam management
-
Accounting
-
Back office
-
Settings
-
Parent’s panel
-
Addon bundle
-
FAQ
How to manage expenses
After creating the expense categories, the school admin and accountants can add, update, or remove expenses. They can overview the expense details from the expense managing list.
Adding new expenses:
To add a new expense, the admin and accountants can follow the steps below:
- Log in to the application.
- Select the "Accounting" option from the left menu.
- Click on the "Expense Manager" option from the sub-menu.
- Tap on the "Add new expense" button to add a new expense to the school.
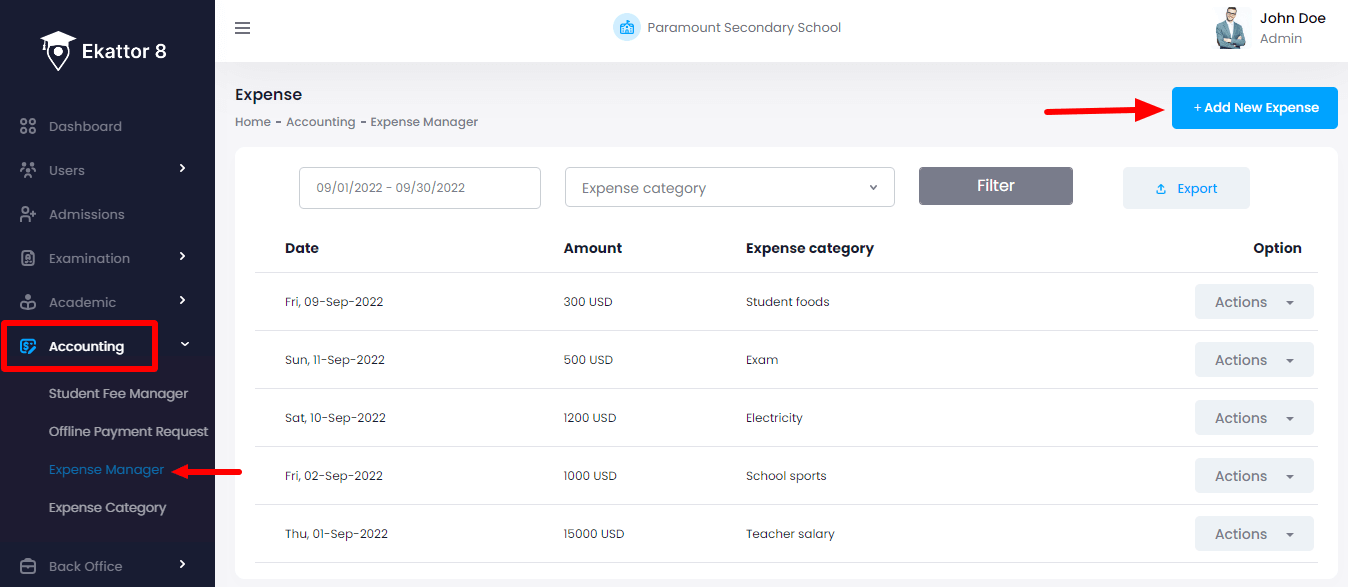
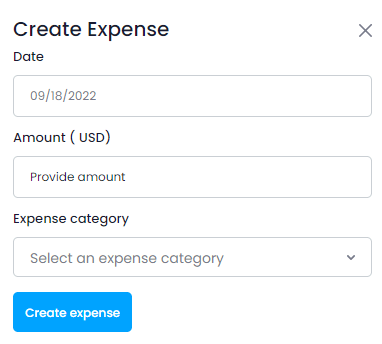
- Provide the required information.
- Click on the "Create expenses" button to save new expenses.
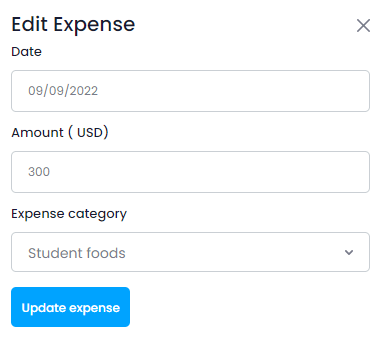
Updating expenses:
To update expenses information, the admin and accountants can follow the steps below:
- Log in to the application.
- Select the "Accounting" option from the left menu.
- Click on the "Expense Manager" option from the sub-menu.
- Provide the required information and click on the "Filter" button.
- Select an expense from the list.
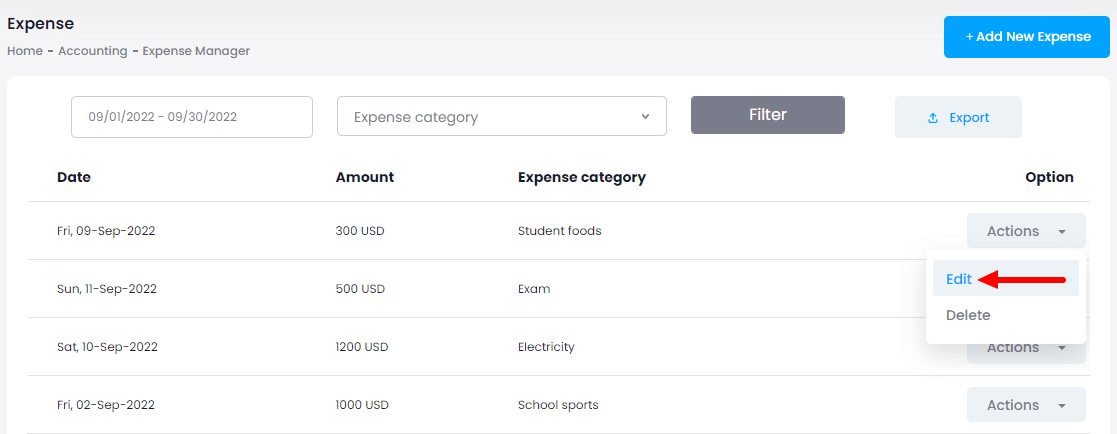
- Click on the "Actions" button for more options.
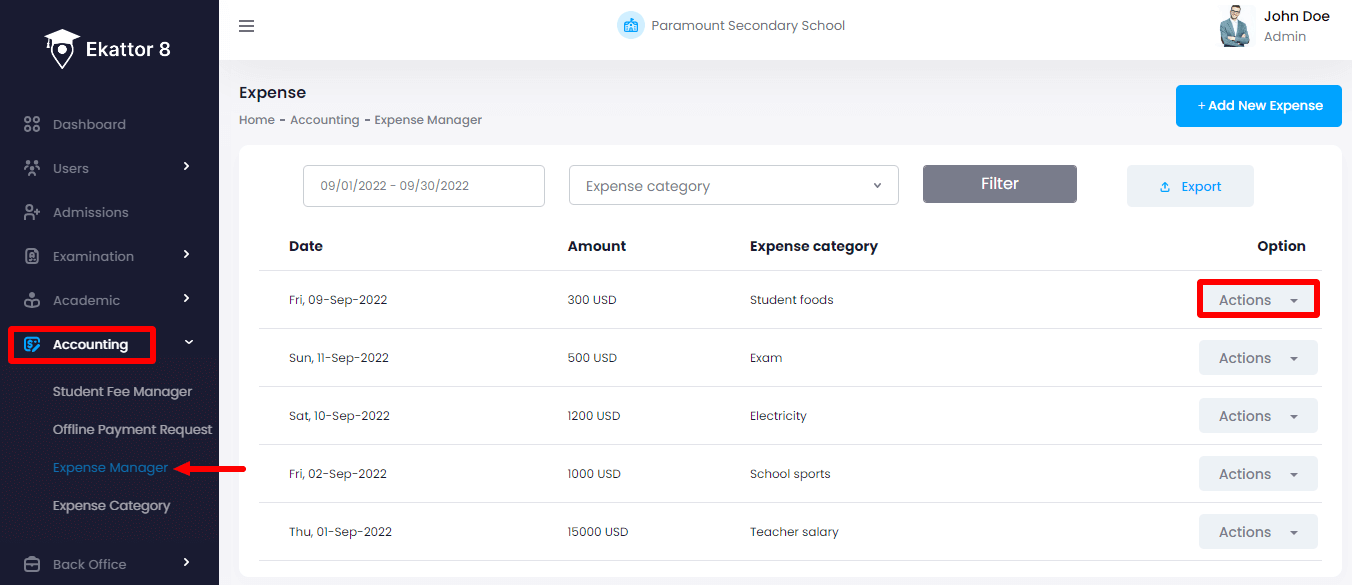
- Select the "Edit" button.
- Update required information.
- Click on the "Update expenses" button for confirmation.
Deleting expenses:
To delete expenses information, the admin and accountants can follow the steps below:
- Log in to the application.
- Select the "Accounting" option from the left menu.
- Click on the "Expense Manager" option from the sub-menu.
- Provide the required information and click on the "Filter" button.
- Select an expense category from the list.
- Click on the "Actions" button for more options.

- Select the "Delete" button.
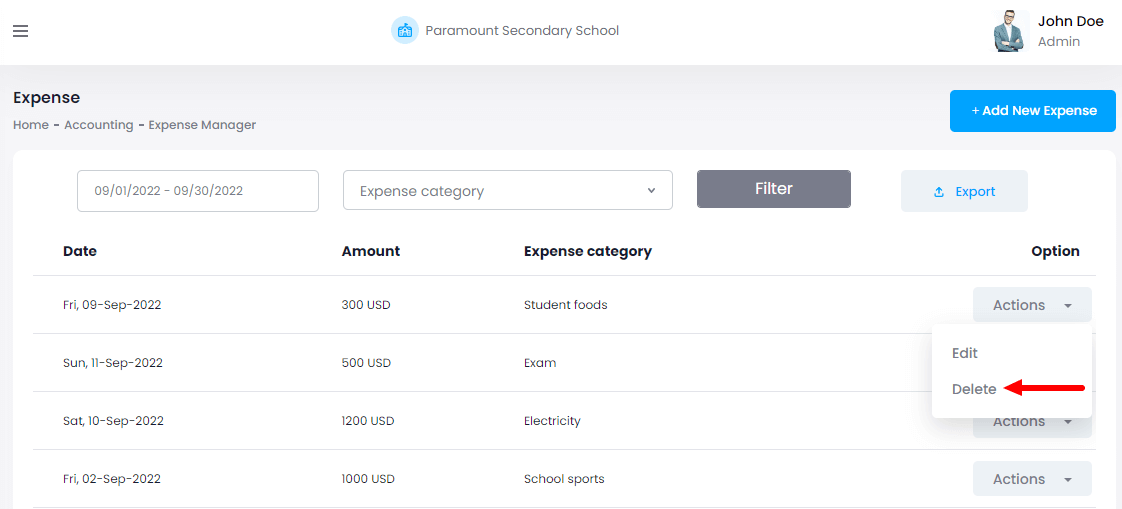
- Click on the "Yes" button for confirmation.
Admin and accountants can also download the expenses list by selecting the "Export report" button after clicking on the "Filter" button. They can download the expenses list in 3 different ways. They are:
- As PDF file
- Get the hardcopy through Printout
Contact us and we'll get back to you as soon as possible
