
Documentation
Inventory Addon
Enhance the feature of managing your school's inventories within a few clicks with the Ekattor 8 inventory manager addon. You can add the categories of your school's inventories, manage inventories, and add the inventories purchasing/selling info in detail.
How to install the addon bundle:
Only the super admin can install the addon bundle in Ekattor 8. Follow the step to install the addon bundle to the application.
- Before installing the process, we highly recommend you check your application version. For this, you have to navigate to the "About" option from the "Settings" menu.

- If you are running the mentioned version, then you are ready to install this addon.
- Download the addon you want to install on your application from Codecanyon.
- Unzip the downloaded file.
- You will get two folders inside the file. One for documentation and the other for the addon folder.
- Do not try to remove or rename any folder.
- Go back to the application and log in as a superadmin.
- Select the "Addon" option from the left menu.
- Click on the "Add new addon" button.

- Upload the addon zip file and provide the purchase code of the application.
- Click on the "Install addon" button.
- You will get a success message notification.
After installing the addon bundle, the school admin and accountant can use this addon in a school.
Managing Inventory category:
To manage a school's inventories, your school admin/accountants have to create some categories for the inventories. Follow the steps to create the category below:
- Log in to the application as an admin/accountant.
- Go to the "Inventory" option from the left menu.
- Click on the "Inventory category" option from the sub-menu.
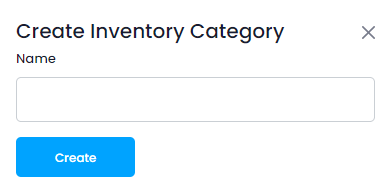
- Tap on the "Add inventory category" button.

- Provide the category name.
- Click on the "Create" button.
Users can also update the category information within a few clicks. For this, users can follow the steps below.
- Log in to the application as an admin/accountant.
- Go to the "Inventory" option from the left menu.
- Click on the "Inventory category" option from the sub-menu.
- Select a category from the list.
- Click on the "Action" button for more info.

- Select the "Edit" option.

- Update required info.
- Click on the "Update" option.

Users can also remove any category information easily. For this, users can follow the steps below.
- Log in to the application as an admin/accountant.
- Go to the "Inventory" option from the left menu.
- Click on the "Inventory category" option from the sub-menu.
- Select a category from the list.
- Click on the "Action" button for more info.

- Select the "Delete" option.

- Tap on the "Yes" button for confirmation.
Managing inventories:
After creating the categories, users can easily create inventories within a few clicks with detailed information. To create inventories, users can follow the steps below:
- Log in to the application as an admin/accountant.
- Go to the "Inventory" option from the left menu.
- Click on the "Inventory manager" option from the sub-menu.
- Tap on the "Add Inventory" button.

- Provide inventory name.
- Add a category.
- Add quantity, unit price, and adding date.
- Click on the "Create" button.

Your users can also update their inventory info easily. For that, they can follow the steps below.
- Log in to the application as an admin/accountant.
- Go to the "Inventory" option from the left menu.
- Click on the "Inventory manager" option from the sub-menu.
- Select an inventory from the list.
- Click on the "Action" button for more info.

- Select the "Edit" option.

- Update required info.
- Click on the "Update" option.

Users can also list their inventories as sold on this addon. To mark their inventories as sold, they can follow the steps below:
- Log in to the application as an admin/accountant.
- Go to the "Inventory" option from the left menu.
- Click on the "Inventory manager" option from the sub-menu.
- Select an inventory from the list.
- Click on the "Action" button for more info.

- Select the "Sell" option.

- Tap on the "Yes" button for confirmation.
To remove the inventories from the list, users can follow the steps below.
- Log in to the application as an admin/accountant.
- Go to the "Inventory" option from the left menu.
- Click on the "Inventory manager" option from the sub-menu.
- Select an inventory from the list.
- Click on the "Action" button for more info.

- Select the "Delete" option.

- Tap on the "Yes" button for confirmation.
You can also export inventory details as PDF or print by clicking on the "Export" button.

Buy report:
The school admin and accountants can see their buy reports of their school inventories with every detail through this addon. They can also download invoices. To see their buy report, they can follow the steps below.
- Log in to the application as an admin/accountant.
- Go to the "Inventory" option from the left menu.
- Click on the "Buy and sell report" option from the sub-menu.
- Select the "Buy report" option.

To download the invoice, users can follow the steps below:
- Select a report from the "Buy report" list.
- Click on the "Invoice" button.
- Tap on the "Print invoice" button.

Sell report:
The school admin and accountants can see their sell reports of their school inventories with every detail through this addon. They can also download invoices. To see their sell report, they can follow the steps below.
- Log in to the application as an admin/accountant.
- Go to the "Inventory" option from the left menu.
- Click on the "Buy and sell report" option from the sub-menu.
- Select the "Sell report" option.

To download the invoice, users can follow the steps below:
- Select a report from the "Sell report" list.
- Click on the "Invoice" button.
- Tap on the "Print invoice" button.

How can we help?
Contact us and we'll get back to you as soon as possible